Good day yet again!
Alright, I've been at this blogging business for a while now. I still don't know if anyone out there in Internet-land is reading, but that's ok because I started this mostly as a means of killing time at work. Now hopefully the original purpose of "Dude, Cook!" has not been lost on all of you and a few of you have tried your hand(s) at cooking up something delicious. Even better, I'm hoping at least some of you have grown to enjoy it!
Now, ask any semi-accomplished cook and they'll tell you they have at least one 'favourite' recipe that they've invented/adapted. Me, I have a few, but I think I like the following recipe the best because it's so easy, prolific and, I imagine, healthy!
Way back when, I was a pretty domesticated fellow; I lived with my fiancée and she was a pretty darn good cook in her own right. One of her specialities was beef burritos. They were tasty, spicy, and one batch provided lunches for quite some time. Well, some time in 2006 I found myself having a craving for burritos, but for some reason I NEEDED chicken to be the meat. I know, weird.
So, I put together a quick recipe in my mind, confirmed some of the elements using the Internet, and went to town the next night. The results were so much better than I expected.
Since then, I've not made this recipe nearly as much as I should. Especially in this frozen season where nothing is quite as satisfying as this taste-filled, protein-packed, cheese-covered spicy treat. So, with that in mind, I give you my version of the Chicken Burrito:
Chicken Burritos
Ingredients
- 2 cloves garlic, minced
- 2 tbsp veg or olive oil
- 1 lb cooked chicken meat, shredded (skinless) - breast or thigh works well
- 1 can black beans, drained (reserve some liquid)
- 1-2 ripe tomato, minced
- 2 tbsp cumin
- 2 tbsp chili powder
- 2 tsp cayenne pepper
- 1 tsp salt
- 1 small red onion, finely diced
- 1 sweet red pepper, finely diced
- ½ cup salsa (use homemade or PC Black Bean and Corn Salsa)
- hot sauce to taste
- ¼ cup chopped fresh cilantro
- 6 large flour tortillas
- ½ cup grated cheddar and/or Monterey Jack (optional)
Preparation
- In large skillet or saucepan, fry garlic in oil
- Add chicken, beans, tomato and spices, ‘mashing’ together with a potato masher into a pasty consistency (use bean liquid if necessary)
- Cook for 10-15 mins.
- Add onion, pepper and salsa; cook for 10-15 more mins., or till water has been cooked out
- Stir in hot sauce and remove from heat; add cilantro once mixture is no longer hot
- Spoon mixture into tortillas and arrange into appropriate shape (this is something that I cannot teach you, I still suck at this part)
- Bake for 10-15 mins. at 350 F
- Top with grated cheddar or Monterey Jack if desired
- Wrap and freeze extra burritos
And that's that! Try it, I bet you'll enjoy it!
Cheers!
Monday, January 24, 2011
Saturday, January 22, 2011
Smoking - Part 2 - Pork Tenderloin and Seafood
Hey kids!
I'm back with more on my new favourite cooking activity: smoking. Now I started out with ribs, which is the meal that takes the longest of the ones I've tried so far. Some day I'm going to give pulled pork a shot, but that's at least 12 hours worth of smoking; not exactly a practical idea for the middle of Winter. So, the hardest recipe has already been accounted for, but the next ones require a little more finesse in flavouring. As I mentioned before, ribs are almost a blank canvass for flavouring. Pork tenderloin also has a certain neutrality of flavour, but it's important to keep an eye out for the danger of oversmoking the pork, thus drying it out. Fish, on the other hand, is very distinctive in its flavour and, while I've not screwed it up yet, could easily be ruined with the wrong kind of wood or too much time in the smoker.

Smoking's easy, even in Winter!
Alright, let's start with the pork tenderloin. The first time I made it, in the Summer of 2009, I used a similar rub to my ribs, about 3 to 1 parts brown sugar to berbere spice. The second time was for a "holiday" party this past December (what my friend, the hostess, calls Chrismakuh) and I wanted to go with a more seasonal flavouring. Here's the rub recipe (as extrapolated from my brain, it might not be exactly what I used):
- 1/2 cup brown sugar
- 1/2 tsp cinnamon
- 3 green cardamom pods, ground
- 2 cloves, ground
- 1/2 tsp ground nutmeg
- 1 tsp ground black pepper
- 1 tsp salt
- 2 tsp rosemary, crushed or ground
Rub the meat with this mix, wrap in plastic and refrigerate for about 3-4 hours. Remove from fridge and let warm up a little.
Prep fire in the smokebox and soak wood chips. The great thing about pork is that it tastes good with almost any kind of smoke flavouring it. In the case of a tenderloin, I would avoid using just hickory or mesquite, the smoke flavour would be too strong. Now, I use maple lump charcoal for everything on my BBQ and just on its own imbues a tasty smoke flavour, but it's a bit one-dimensional. For pork tenderloin, I've used either a mix of hickory and cherry (the first time, which nicely complimented the spicy rub), or apple (for the 'festive' meal). I think apple is my favourite flavouring wood when avoiding the spicy route (you know, the one Columbus was looking for); it adds a distinct yet subtle flavour and sweetness.
Once your fire is going and you reach a cooking temperature of around 225-250 degrees Fahrenheit, place the tenderloin(s) inside the the grill and smoke for 1.5 to 2 hours. Wrap the tenderloin in foil, spray with a bit of apple juice, and return to smoker for another hour. Unwrap and smoke for another 30 minutes to finish. You may need to put it in the oven for 10 minutes at 350 to ensure it's done, but it should be OK. The thing about tenderloin is that it stays a little more pink than other cuts of pork even when it's overcooked. So, don't think that it isn't done just it's a bit pink. If the meat is no longer translucent and juices run clear when you cut it, it's done. Basically that's the rule for all pork and chicken.
Slice pork into medallions and serve any which way you like! The first time, I served the pork as is with some gorgeously roasted sweet potatoes my friend made. For the Christmakuh meal, I made an apple-cranberry compote, but it didn't turn out quite as I wanted, so I won't reprint the recipe here. But if your Aunt Betty or Matante Lise makes a good homemade relish, give it a try with this!
SMOKING SHRIMP
Next up, shrimp. Because they're so small, shrimp don't require much time in the smoker. The only time I ever tried this, most of the space was taken up by the fish I was smoking at the same time (more on that later), but I was easily able to fit a pound worth of shrimp in the gaps between the pieces of fish and they turned out fine.
First step is to marinate the shrimp for an hour or two. This adds a lot of flavour, but also adds a great deal of moisture that will mess up the texture a little bit, but there's a way to fix that. It's up to you if you want to peel the shrimp or not, I don't.
Basically, thaw out a pound of medium shrimp and place in the marinade outlined below.
 Shrimp Marinade
- juice of 1/4 lime
- 1/2 cup olive oil
- 2 tbsp minced fresh ginger
- 2 crushed garlic cloves
- 2 cardamom pods, crushed
- 8-10 coriander seeds, crushed
- 4 tbsp brown sugar
- 1 tsp salt
- 1 tsp cracked black pepper
Start your fire and prepare shrimp for smoking. I imagine just about any kind of wood will work here since shrimp is such a versatile meat. I used a mix of Apple and Alder wood chips, soaked for a half hour, as always. You'll want your temperature to sit at around 225 degrees Fahrenheit and the smoking process will only be an hour or so.
Now, when I first tasted the shrimp, it was cooked, but a little mushy. That's probably due to trapped moisture. No problem, the magic "10 minutes in the oven at 350" solution works in this case as well.
Peel shrimp for guests or let them do it themselves! Serve with some kind of dipping goodness, even good old fashioned cocktail sauce if you wish!
SMOKING FISH
OK, now we get into what I think is my favourite exercise in smoking: FISH!!!!
Now I'll be the first to admit that fish isn't to everyone's taste, but it's interesting to note that many folks who would normally avoid fish like the plague get their taste buds in a tizzy when you serve up a gorgeous slab of smoked salmon.
Now, I've never done salmon on the smoker. Mostly because I know what it tastes like and it wouldn't be terribly original. So, back in the early Fall, I was on a mission to find a kind of fish that wouldn't be like the all too familiar smoked salmon or trout. Enter tilapia. Tilapia is a firm fleshed and sweet white fish that isn't chock full of that 'fishy' taste that makes other kinds of smoked fish so distinctive. I gave it a shot after some online research on how to cure or brine the meat. I found a good brine recipe, but cut down the amounts of salt.
The second time I smoked tilapia for a family get-together, I made sure to reduce salt amounts even further and add a few nuances to the brine for flavouring. Here's what I came up with:
 Tilipia Brine (for approx. 1-2 lb. of fillets)
- 4 cups water
- 1/2 cup salt
- 1/2 cup (white) sugar
- juice of 1/4 orange- juice of 1/4 lime
- 2 crushed garlic cloves
- 3 bay leaves, crushed
- 1 tsp cracked black pepper
- 2 cardamom pods, crushed
- pinch cayenne pepper
As you can see, I'm fairly low-tech when it comes to writing down recipes. I bashed the brine/marinade recipes for shrimp, tilapia and Arctic char while at work.
 Here is the tilapia brining away. Important to note about brining: NEVER use a metal container. The acidic elements in the brine will react with the metal and leech god-knows-what into the meat. Glass or ceramic are best, but plastic is OK for short term brining.
 Brine the fish for about 2 hours. Once ready, ensure you rinse the fish well to get rid of some of the salt, and pat as dry as possible before putting in the smoker.
Start your fire and aim for a steady 210-225 degrees. Use Alder or Apple or both. It'll take about 2 hours to smoke for 2 pounds of tilapia fillets. Once done, I found that the flavour was delicious and unique, but the texture was a bit rubbery. So once again I went to the 15 minutes in the oven fix-all. Not sure why it works so well, but it does! I guess it's because it cooks off any excess moisture that might mess with the texture of the meat.
So, when I committed to smoking a bunch of fish for a family gathering, I had originally thought I was going to do trout as well as tilapia, but when I got to the fish section of the supermarket, the Arctic char was practically leaping out at me. Arctic char is similar to salmon, but with a more distinctive flavour and lighter texture. I couldn't pass up the opportunity to give it a shot.
First was coming up with a good brine. I thought a dose of orange and maple would be good, but I wanted to keep the flavours subtle. Char is so good on its own that trying to do too much with it would be like dousing filet mignon in ketchup. So here's what I came up with:
 Arctic Char Brine (for up to 1 lb. fillet)
- 2 cups water
- 1/4 cup salt
- 1/4 cup brown sugar
- juice of 1/8 orange
- 1 tsp maple syrup
- 1 crushed garlic clove - black pepper to taste
- 1 tbsp chopped fresh dill
I smoked the char at the same time as the tilapia and it all turned out in the end. Again, 15 minutes in the oven was the finishing touch. It was sooooo delicious. I'd gladly do that one again!
So, that's about it. Smoking fish is easy and tasty. Don't fear the fish! Next on the "To Smoke" list: chicken, beef brisket and pulled pork!
And, as an added bonus, here are some pictures of fish smoking process before the big family Xmas gathering on December 30, 2010.

The whole shebang marinating/brining.


The finished product! I whipped together some whipping cream and sour cream for a makeshift crème fraiche. Worked great!

My brother being grabby! Too bad I didn't have a wooden spoon handy to give his knuckles a well-deserved rap!

I also whipped up some crostini-type dealies for an added bonus.
Monday, January 3, 2011
Smoking - Part 1 - Overview and Ribs
-
Happy New Year, fellow foodophiles!
Here's a tale that has no business being told in the middle of Winter, but I did promise to blog about smoking food a while back and I wouldn't want anyone accusing me of blogular reneging.
Back in Summer of 2007, I moved into a one-bedroom apartment on my own. This was the first time I'd done so since 2003 and I found myself needing a lot of stuff, namely a barbecue to go on my awesome deck, which was the main reason why I took this apartment in the first place! Now, where I'm from, there are laws prohibiting gas barbecues in apartments. The reason for this? There's a safety risk in having a potentially explosive propane tank inside. Now I know that many people flout this law, but it got me thinking that perhaps I should explore the idea of a charcoal barbecue instead, which is completely legal. I know I covered this in my April post about BBQ season, but it's part of the narrative, so stick with me here.
Anyhoo, off I went to Canadian Tire with my girlfriend and picked out a very affordable BBQ with an offset smoker box. I didn't really think I'd use the smoker much, but it was about a 20 dollar difference from the model that didn't have the box, so I figured "you never know" and bought it. Here's a picture of my baby (the smokebox is the smaller compartment on the left)!

I went a couple of years before even trying out the smoker, but finally gave it a go in the Summer of 2009. I figured the first thing to try was ribs. After all, ribs are one of the best "blank canvasses" when it comes to cooking, and it's not difficult to cover up your mistakes with lots of BBQ sauce. But before you can smoke anything, you need fuel!
CHOOSING YOUR WOOD
I prefer using lump charcoal. It provides a more natural flavour and ignites faster. Lump charcoal burns a lot faster than briquettes, but that's OK when smoking, because you usually smoke food at low temperatures and something that burns fast will allow you to regulate your heat better. In addition to charcoal, you'll need some kind of wood to help flavour the smoke. I've acquired lots of different types of wood from Home Hardware and Canadian Tire. I imagine Wal-Mart, Rona, Lowe's and many others also carry wood for BBQ/smoking. Right now, I've gathered a supply including Maple, Cherry, Apple, Alder, Hickory, Mesquite and Cedar. I'd like to get some Pecan and Peach as well, if only to see how different a flavour they impart. I read a story online from an expat in Thailand mentioning how the locals use Mango wood to smoke their food. How awesome would that be!?!?
Now, you may ask yourself, which wood should I be using? Well, that all depends on what you're smoking. I've only done pork, fish and shrimp so far, so I haven't used all the types available. But here's a basic guide to what woods match well to what foods:
- Alder: mild and slightly sweet. Best with fish, pork and poultry
- Apple: fruity and sweet, especially good with pork. I like to use it with fish as well, but that might not be considered "normal"
- Cherry: rich, fruity, slightly sweet. Goes well with any meat. I like to smoke pork tenderloin with a mix of cherry and hickory.
- Hickory: rich, strong smoky flavour. Probably the most common wood used in smoking and good for anything except possibly fish (Hickory would overpower the natural flavour of any white fish and maybe even salmon). A mix of Hickory and Mesquite is good for spicy or peppery meats like ribs and beef brisket.
- Mesquite: strong but slightly sweet. Good for poultry, beef and pork. As with hickory, too strong for fish.
- Cedar: VERY strong flavour, probably too strong for most meats. Since cedar has a very distinctive pine taste, it would overpower just about everything if used in more than the tiniest amounts. And apparently it might be toxic. Makes we wonder why the heck Home Hardware sells it! grumblegrumblegrumble...
- Maple: strong and sweet. Maple could realistically be used with any meat, but the amounts have to be regulated. Also, since most lump charcoal you get in this part of the wood is made of maple, you'll get a maple smoke flavour from that.
Of course, most of this was figured out through a combination of trial and error and Internet research. But, to sum up what I've done and used so far:
- Ribs (made three times): Hickory and Mesquite (and a handful or two of Cherry and/or Apple)
- Pork Tenderloin (made twice): Cherry and/or Hickory
- Tilapia (made twice): Apple and/or Alder
- Arctic Char (made once): Apple and Alder
- Shrimp (made once): Apple and Alder
Alright, let's go on to the first thing I ever smoked: RIBS!
SMOKING RIBS
During a slow day at the office, I took to the Internet for advice on how to pull off smoked ribs. I'd previously done slow cooker ribs and baked/grilled ribs with varying results, but all being tasty (more on that process in this post). One piece of advice though, if you're going to slow cook ribs, remember to skim the fat off the top! I forgot to do so and my ribs were pretty much too fatty to be edible.
Anyhoo, as with just about everything else, the 'Net was chock full of helpful advice. I compiled a bunch of info from a variety of sites, and I've tried a few different ideas. Now, the whole "fall off the bone" concept is one I haven't quite mastered yet, but I've gotten pretty good at the "damn that's tasty" side of it. So, let's get into the "how-to" of smoking ribs. I'm assuming you rushed out and bought an offset smoker or Big Green Egg or something like it and are ready to get on with it!
Right, first things first. What kind of ribs are you going to use? Well, smoking involves a certain amount of drying out of the meat, so I'd go for the more tender cut: back ribs. Side ribs are better for the oven or slow cooker. I've also heard that short ribs work well for smoking, but I haven't given it a try.
For now, let's stick to back ribs. So, how do you smoke a tasty rack of ribs? Well, I'll be the first to admit that I haven't quite gotten the whole 'tenderness' aspect of it figured out, but I'm getting close. So, don't get frustrated, all cooking is a journey towards perfection, but rarely does one arrive.
So, you'll need to prep your rack(s) of ribs before they can be smoked. You'll want to give yourself a day to either brine, marinate or rub your ribs. I've only used the rubbed method, but I'm quite curious to try brining ribs. It's done wonders for my smoked fish recipes (more on those in a bit).
Before you can rub/brine/marinate your ribs, you'll need to remove the membrane, found on the underside of the rack (concave rather than convex); otherwise your ribs will be rather tough. Now removing this thing is somewhat difficult, and is best done with a sharp knife, pliers, possibly even gloves, and great care and patience. I tell you what, let's let the Internet take care of this lesson:
http://www.ehow.com/video_2339996_pork-rib-membrane-removal-tips.html
Alright, now that your membrane is removed, it's time to have some fun! It's rub time! Now, there are rib rubs all over the place. Just pop into any store that sells BBQ equipment and you'll see many brands of rub for sale. Same applies to the supermarket.
Now, being the self-reliant fella that I am, I make my own rub very simply out of a mix of brown sugar and berbere spice, with about a 2-to-1 ratio of sugar to spice.
Here's the berbere spice recipe from the May 27th post:
Berbere spice
1 teaspoon fenugreek seeds
1/2 cup ground dried serrano chili peppers or other ground dried chili peppers
1/2 cup sweet paprika
2 tablespoons salt
2 teaspoons ground ginger
2 teaspoons onion powder
1 teaspoon ground cardamom (preferably freshly ground)
1 teaspoon freshly grated nutmeg
1/2 teaspoon garlic powder
1/4 teaspoon ground cloves
1/4 teaspoon ground cinnamon
1/4 teaspoon ground allspice
Finely grind the fenugreek seeds with a mortar and pestle or in an electric spice or coffee grinder. Combine the remaining ingredients and add the ground fenugreek seeds, mixing well. Refrigerate in an airtight container for up to 3 months (although I've had batches last 6 to 9 months in the fridge and be fine).
Now, the berbere spice is pretty fiery and makes for a rather spicy rib. If you prefer things a bit more tame, there are numerous recipes on the 'Net. For example, here's one from About.com:
Kansas City Rib Rub
Ingredients:
Combine all ingredients together and transfer to an air tight container. Maybe stored up to six months.
Nick's note: You could omit the cayenne if you want barely any heat at all.
Now, once you have your rub all mixed together, I suggest getting a glass/pyrex lasagna pan, place a rack at a time in the pan and generously apply the rub all over, pressing it firmly into the meat to ensure it is absorbed. You might even want to score (slice small cuts on the surface) the meat a bit for maximum absorption.
Once the meat has been coated with the rub, wrap it in plastic wrap, pressing all air out, and store in the fridge for 12-24 hours and dream of smoke and pork and joy.
Next day...
Let's hope you picked a nice sunny day and have an empty calendar for the day, because you're about to embark in a 6-7 hour smoking bonanza. It might be time-consuming, but MAN is it therapeutic! Having a case of cold beer around doesn't hurt either...
So, take your ribs out of the fridge and unwrap them. Let them warm up a little bit, for say 30 minutes. Here's what they look like out of the fridge:
 While the ribs are getting closer to room temperature, you're going to want to get a large container of some sort and fill it halfway full with water. Take handfuls of whatever wood chips you would like to use and soak them in water for at least 30 minutes. That allows the wood chips to burn slowly in the smoker and produce lots of delicious smoke.
Next we start the fire. Let's be clear off the bat: AVOID any kind of chemical fire starter, especially when smoking. It ruins the flavour and is probably not too healthy. So how do you start a fire without lighter fluid? Well, a lot of people swear by the chimney starter, but I have my own method of starting a fire that works pretty well. I use an electric starter like this one:
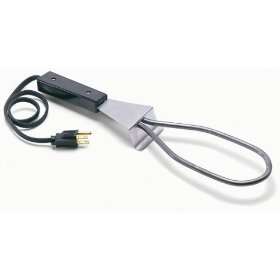
You can find it at the same stores you find all your other BBQ supplies. Just plug it into an extension cord or outdoor outlet. The element heats up quickly and becomes red-hot. Find a way to keep the starter fixed in a position that allows you to pile charcoal on top in a pyramid-type formation as best as possible. Once this is done, leave it for about 10-15 minutes and let the element do its job. You'll hear the fire starting as the charcoal begins to crackle. At this point, unplug the starter and gently remove it from the pile of now-smoldering coals, trying your best not to disturb the coal bed, and put it aside somewhere fireproof as it cools down.
You're not looking for a huge fire here, because we don't want the temperature going over 225-250 degrees Fahrenheit. Keep the pile under about half a foot in diameter and no more than 3-4 inches high. If it isn't hot enough, you can always add more charcoal. If it's too hot, it's a lot harder to remove lit coals! If the fire needs a bit of a boost to get it going, there's always blowing on it, but I find fanning it with a fairly large piece of box board works perfectly.
So now our fire's going and the wood chips are soaking, so it's time to get the meat on the smoker! Place the meat directly on the racks of your main grill area if you're using an offset barrel smoker like mine. Otherwise, follow the instructions on the box!
 Don't worry about the bright patch on the front rack, that's sunlight!
So, now all you have to do is shut the lid and let the smoke do the work! We'll call this Step 1 of what some nice person on the Internet called the "3-2-1 method" of smoking, which consists of 2.5 to 3 hours of smoking the meat as is, followed by 2 hours of smoking the ribs "tented" (wrapped in foil and moistened with some sort of liquid, I use apple juice), and finally 1 hour smoking unwrapped to finish.
Now, I have a little confession to make: I usually cheat and put anything I've smoked in the oven at 350 degrees for 10-15 minutes. It just seems to make everything right in the end. Not entirely sure why...
 So, as you're going through Step 1, ensure you have a steady stream of smoke flowing through the smoker to the meat, add handfuls of wood chips to the fire as you go to keep the smoke going. Also, try to keep the temperature between 225 and 250 degrees. Any smoker should come with a thermometer built in. As for the meat, you don't need to do a thing to it during Step 1.
Now, it's best not to open the lid to the BBQ too much because the smoke can escape, but if you're like me, you occasionally want to look in, just to see how it's coming along.
And because you like to take pictures:

As you can see below, the meat is definitely cooking.

This is about what the ribs are going to look like at the end of Step 1. After 2.5 to 3 hours have passed, it;'s time for Step 2. Remove the ribs from the grill using tongs and place each rack on a piece of heavy-duty aluminium foil large enough to completely wrap up the ribs. Spray a good amount of apple juice or other liquid (but not alcohol or vinegar, as these may dry out the meat) on each rack of ribs, on both the top and bottom. This is going to help steam the ribs and make them more tender. Wrap up the ribs tightly, containing all the juice, and return them to the smoker for another 2-2.5 hours.
 At this point, you might want to get started on the finishing sauce, if you're making one. I posted the recipe for my homemade BBQ sauce back in July, but you can make variations if you want or even use a high-quality store-bought sauce. To be honest though, the ribs will be tasty with or without sauce. It's up to you how you want to serve and/or eat them.

Pull them out of the oven, serve with whatever you're having on the side and chow down!
Is there anything classier than serving a meal on cooler?
Till next time, enjoy!
Happy New Year, fellow foodophiles!
Here's a tale that has no business being told in the middle of Winter, but I did promise to blog about smoking food a while back and I wouldn't want anyone accusing me of blogular reneging.
Back in Summer of 2007, I moved into a one-bedroom apartment on my own. This was the first time I'd done so since 2003 and I found myself needing a lot of stuff, namely a barbecue to go on my awesome deck, which was the main reason why I took this apartment in the first place! Now, where I'm from, there are laws prohibiting gas barbecues in apartments. The reason for this? There's a safety risk in having a potentially explosive propane tank inside. Now I know that many people flout this law, but it got me thinking that perhaps I should explore the idea of a charcoal barbecue instead, which is completely legal. I know I covered this in my April post about BBQ season, but it's part of the narrative, so stick with me here.
Anyhoo, off I went to Canadian Tire with my girlfriend and picked out a very affordable BBQ with an offset smoker box. I didn't really think I'd use the smoker much, but it was about a 20 dollar difference from the model that didn't have the box, so I figured "you never know" and bought it. Here's a picture of my baby (the smokebox is the smaller compartment on the left)!

I went a couple of years before even trying out the smoker, but finally gave it a go in the Summer of 2009. I figured the first thing to try was ribs. After all, ribs are one of the best "blank canvasses" when it comes to cooking, and it's not difficult to cover up your mistakes with lots of BBQ sauce. But before you can smoke anything, you need fuel!
CHOOSING YOUR WOOD
I prefer using lump charcoal. It provides a more natural flavour and ignites faster. Lump charcoal burns a lot faster than briquettes, but that's OK when smoking, because you usually smoke food at low temperatures and something that burns fast will allow you to regulate your heat better. In addition to charcoal, you'll need some kind of wood to help flavour the smoke. I've acquired lots of different types of wood from Home Hardware and Canadian Tire. I imagine Wal-Mart, Rona, Lowe's and many others also carry wood for BBQ/smoking. Right now, I've gathered a supply including Maple, Cherry, Apple, Alder, Hickory, Mesquite and Cedar. I'd like to get some Pecan and Peach as well, if only to see how different a flavour they impart. I read a story online from an expat in Thailand mentioning how the locals use Mango wood to smoke their food. How awesome would that be!?!?
Now, you may ask yourself, which wood should I be using? Well, that all depends on what you're smoking. I've only done pork, fish and shrimp so far, so I haven't used all the types available. But here's a basic guide to what woods match well to what foods:
- Alder: mild and slightly sweet. Best with fish, pork and poultry
- Apple: fruity and sweet, especially good with pork. I like to use it with fish as well, but that might not be considered "normal"
- Cherry: rich, fruity, slightly sweet. Goes well with any meat. I like to smoke pork tenderloin with a mix of cherry and hickory.
- Hickory: rich, strong smoky flavour. Probably the most common wood used in smoking and good for anything except possibly fish (Hickory would overpower the natural flavour of any white fish and maybe even salmon). A mix of Hickory and Mesquite is good for spicy or peppery meats like ribs and beef brisket.
- Mesquite: strong but slightly sweet. Good for poultry, beef and pork. As with hickory, too strong for fish.
- Cedar: VERY strong flavour, probably too strong for most meats. Since cedar has a very distinctive pine taste, it would overpower just about everything if used in more than the tiniest amounts. And apparently it might be toxic. Makes we wonder why the heck Home Hardware sells it! grumblegrumblegrumble...
- Maple: strong and sweet. Maple could realistically be used with any meat, but the amounts have to be regulated. Also, since most lump charcoal you get in this part of the wood is made of maple, you'll get a maple smoke flavour from that.
Of course, most of this was figured out through a combination of trial and error and Internet research. But, to sum up what I've done and used so far:
- Ribs (made three times): Hickory and Mesquite (and a handful or two of Cherry and/or Apple)
- Pork Tenderloin (made twice): Cherry and/or Hickory
- Tilapia (made twice): Apple and/or Alder
- Arctic Char (made once): Apple and Alder
- Shrimp (made once): Apple and Alder
Alright, let's go on to the first thing I ever smoked: RIBS!
SMOKING RIBS
During a slow day at the office, I took to the Internet for advice on how to pull off smoked ribs. I'd previously done slow cooker ribs and baked/grilled ribs with varying results, but all being tasty (more on that process in this post). One piece of advice though, if you're going to slow cook ribs, remember to skim the fat off the top! I forgot to do so and my ribs were pretty much too fatty to be edible.
Anyhoo, as with just about everything else, the 'Net was chock full of helpful advice. I compiled a bunch of info from a variety of sites, and I've tried a few different ideas. Now, the whole "fall off the bone" concept is one I haven't quite mastered yet, but I've gotten pretty good at the "damn that's tasty" side of it. So, let's get into the "how-to" of smoking ribs. I'm assuming you rushed out and bought an offset smoker or Big Green Egg or something like it and are ready to get on with it!
Right, first things first. What kind of ribs are you going to use? Well, smoking involves a certain amount of drying out of the meat, so I'd go for the more tender cut: back ribs. Side ribs are better for the oven or slow cooker. I've also heard that short ribs work well for smoking, but I haven't given it a try.
For now, let's stick to back ribs. So, how do you smoke a tasty rack of ribs? Well, I'll be the first to admit that I haven't quite gotten the whole 'tenderness' aspect of it figured out, but I'm getting close. So, don't get frustrated, all cooking is a journey towards perfection, but rarely does one arrive.
So, you'll need to prep your rack(s) of ribs before they can be smoked. You'll want to give yourself a day to either brine, marinate or rub your ribs. I've only used the rubbed method, but I'm quite curious to try brining ribs. It's done wonders for my smoked fish recipes (more on those in a bit).
Before you can rub/brine/marinate your ribs, you'll need to remove the membrane, found on the underside of the rack (concave rather than convex); otherwise your ribs will be rather tough. Now removing this thing is somewhat difficult, and is best done with a sharp knife, pliers, possibly even gloves, and great care and patience. I tell you what, let's let the Internet take care of this lesson:
http://www.ehow.com/video_2339996_pork-rib-membrane-removal-tips.html
Alright, now that your membrane is removed, it's time to have some fun! It's rub time! Now, there are rib rubs all over the place. Just pop into any store that sells BBQ equipment and you'll see many brands of rub for sale. Same applies to the supermarket.
Now, being the self-reliant fella that I am, I make my own rub very simply out of a mix of brown sugar and berbere spice, with about a 2-to-1 ratio of sugar to spice.
Here's the berbere spice recipe from the May 27th post:
Berbere spice
1 teaspoon fenugreek seeds
1/2 cup ground dried serrano chili peppers or other ground dried chili peppers
1/2 cup sweet paprika
2 tablespoons salt
2 teaspoons ground ginger
2 teaspoons onion powder
1 teaspoon ground cardamom (preferably freshly ground)
1 teaspoon freshly grated nutmeg
1/2 teaspoon garlic powder
1/4 teaspoon ground cloves
1/4 teaspoon ground cinnamon
1/4 teaspoon ground allspice
Finely grind the fenugreek seeds with a mortar and pestle or in an electric spice or coffee grinder. Combine the remaining ingredients and add the ground fenugreek seeds, mixing well. Refrigerate in an airtight container for up to 3 months (although I've had batches last 6 to 9 months in the fridge and be fine).
Now, the berbere spice is pretty fiery and makes for a rather spicy rib. If you prefer things a bit more tame, there are numerous recipes on the 'Net. For example, here's one from About.com:
Kansas City Rib Rub
Ingredients:
1/2 cup brown sugar
1/4 cup paprika
1 tablespoon black pepper
1 tablespoon salt
1 tablespoon chili powder
1 tablespoon garlic powder
1 tablespoon onion powder
1 teaspoon cayenne
Preparation:
Combine all ingredients together and transfer to an air tight container. Maybe stored up to six months.
Nick's note: You could omit the cayenne if you want barely any heat at all.
Now, once you have your rub all mixed together, I suggest getting a glass/pyrex lasagna pan, place a rack at a time in the pan and generously apply the rub all over, pressing it firmly into the meat to ensure it is absorbed. You might even want to score (slice small cuts on the surface) the meat a bit for maximum absorption.
Once the meat has been coated with the rub, wrap it in plastic wrap, pressing all air out, and store in the fridge for 12-24 hours and dream of smoke and pork and joy.
Next day...
Let's hope you picked a nice sunny day and have an empty calendar for the day, because you're about to embark in a 6-7 hour smoking bonanza. It might be time-consuming, but MAN is it therapeutic! Having a case of cold beer around doesn't hurt either...
So, take your ribs out of the fridge and unwrap them. Let them warm up a little bit, for say 30 minutes. Here's what they look like out of the fridge:

Next we start the fire. Let's be clear off the bat: AVOID any kind of chemical fire starter, especially when smoking. It ruins the flavour and is probably not too healthy. So how do you start a fire without lighter fluid? Well, a lot of people swear by the chimney starter, but I have my own method of starting a fire that works pretty well. I use an electric starter like this one:
You can find it at the same stores you find all your other BBQ supplies. Just plug it into an extension cord or outdoor outlet. The element heats up quickly and becomes red-hot. Find a way to keep the starter fixed in a position that allows you to pile charcoal on top in a pyramid-type formation as best as possible. Once this is done, leave it for about 10-15 minutes and let the element do its job. You'll hear the fire starting as the charcoal begins to crackle. At this point, unplug the starter and gently remove it from the pile of now-smoldering coals, trying your best not to disturb the coal bed, and put it aside somewhere fireproof as it cools down.
You're not looking for a huge fire here, because we don't want the temperature going over 225-250 degrees Fahrenheit. Keep the pile under about half a foot in diameter and no more than 3-4 inches high. If it isn't hot enough, you can always add more charcoal. If it's too hot, it's a lot harder to remove lit coals! If the fire needs a bit of a boost to get it going, there's always blowing on it, but I find fanning it with a fairly large piece of box board works perfectly.
So now our fire's going and the wood chips are soaking, so it's time to get the meat on the smoker! Place the meat directly on the racks of your main grill area if you're using an offset barrel smoker like mine. Otherwise, follow the instructions on the box!

So, now all you have to do is shut the lid and let the smoke do the work! We'll call this Step 1 of what some nice person on the Internet called the "3-2-1 method" of smoking, which consists of 2.5 to 3 hours of smoking the meat as is, followed by 2 hours of smoking the ribs "tented" (wrapped in foil and moistened with some sort of liquid, I use apple juice), and finally 1 hour smoking unwrapped to finish.
Now, I have a little confession to make: I usually cheat and put anything I've smoked in the oven at 350 degrees for 10-15 minutes. It just seems to make everything right in the end. Not entirely sure why...

Now, it's best not to open the lid to the BBQ too much because the smoke can escape, but if you're like me, you occasionally want to look in, just to see how it's coming along.
And because you like to take pictures:


This is about what the ribs are going to look like at the end of Step 1. After 2.5 to 3 hours have passed, it;'s time for Step 2. Remove the ribs from the grill using tongs and place each rack on a piece of heavy-duty aluminium foil large enough to completely wrap up the ribs. Spray a good amount of apple juice or other liquid (but not alcohol or vinegar, as these may dry out the meat) on each rack of ribs, on both the top and bottom. This is going to help steam the ribs and make them more tender. Wrap up the ribs tightly, containing all the juice, and return them to the smoker for another 2-2.5 hours.

So after Step 2 has passed, unwrap the ribs again and place them back on the grill for another hour. Spray them again with apple juice to keep tender. If there any woods you want to experiment with, now's the time. The smoke won't penetrate right into the meat, but it will flavour the surface of it.
This is what your ribs will look like after being wrapped. GORGEOUS!

Smoke for another hour. Once done, place onto a baking sheet and cook in the oven for another 10-15 minutes. You can choose to cut them into segments before or after baking them. I did cut them up before baking last time and it worked well.
Pull them out of the oven, serve with whatever you're having on the side and chow down!
 |
Is there anything classier than serving a meal on cooler?
Till next time, enjoy!
Subscribe to:
Posts (Atom)