Saturday, November 19, 2011

A Toast To My Hometown's Better Food Purveyors

Hi there!

Sometimes I get lucky timing and my girl and I get a weekday off together. Usually there's a mission to make kickass meals involved. Now, we do most of our shopping in the Byward Market, but we also figured we'd take a walking tour of Ottawa's Little Italy to see what we could find in the 'awesome food' category. It did not turn out as well as we had hoped, but we did find a lot of neat stuff. But in the end, we wound up back in our beloved Byward Market. So, while the walk was good for us and fun, we found all the foodstuffs we needed for an epic meal of Tuscan-Style Steak Salad, Mushroom Stew and Tomato Bread Pudding (recipes/inspiration courtesy of Chef Michael Smith and his Chef at Home program) in the Market and discovered that Little Italy isn't the best friend of the home chef. That being said, we ended up finding some pretty epic food over the course of our little adventure.

Off to explore!


So, our first stop was the Art-Is-In Bakery, about  1.5 kilometres from our apartment, sort of just before Little Italy proper. We wanted to get a nice, hearty loaf of bread to go with our Tomato Bread Pudding. We also thought we might enjoy a snack... Look at the tale in pictures below to understand how that snack came to be...


First stop - Baked goodness!


So much tasty bread! We picked one called "Crazy Grains"


"Hmmmm, what am I hungry for...? Wait, what the eff is that in the bottom right corner? Bread... Crème... Caramel...
FRAK YES!!!!!!"


This (sweet) Bread Pudding was soooooo tasty. It had pieces of freakin' chocolate croissant in it!!!


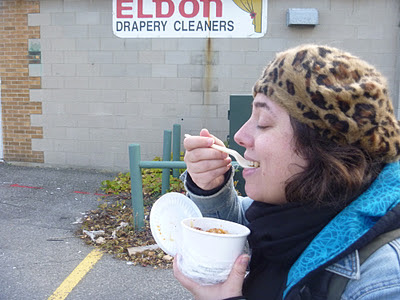
The spokesmodel sure likes it!


So, our bellies full of warm caramelly goodness, we continued on our voyage into Little Italy, looking for some neat spots to buy good foodstuffs. We passed by a butcher shop and took note to come back (lugging steak around for a while is not the best plan). Our first stop was a more practical one at Preston Hardware to get charcoal for the evening's steaks. I picked up a bag of Jack Daniel's "Whiskey Barrel Charcoal" which contains charcoal briquettes made from the barrels they make JD in as well as little blocks of wood from the barrels that can be used for smoking or as extra fuel. I was amazed at how easily they lit, how little chemical taste they produced and how hot the coals got! Damn near broke the needle on the thermometer! So, highly recommended for grilling, especially when going for a real nice outer sear on meat.


So, as we progressed from one end of Preston Street to the other, we noticed two things. First, there are a lot of Italian restaurants I want to try! Second, there is a marked lack of proper grocers/supermarkets in the area. There are maybe two fully appointed grocers: Casa Nicastro, which was a smurf-village version of La Bottega Nicastro in the Byward Market (more on that later), but we did pick up some lovely Pecorino Romano cheese from there, and Luciano's (mentioned earlier). But upon inspection of Luciano's, they a) were ridiculously remiss in their supply of fruits and veg, and b) didn't have meat that was any better of cheaper than what could be found in the Market. So we pretty much made up our minds to head home with what we had, hop a bus to the Market, and get our foodstuffs from people who already know our names! OK, maybe there's a neighbourhood bias leaking out, sorry...

But before we even thought of quitting Little Italy, I did want to introduce Kari to a city tradition: the Dirienzo's sandwich. Dirienzo's is a little corner store on Beech Street that sells Italian groceries, but are best known for their sandwiches. So we got a couple to go and were back on our merry way home, and then  to the Byward Market.

Coming up to Di Rienzo's

That's a big sammich!


Surprisingly, while the sandwiches from Di Rienzo's were pretty darn tasty, I found them to be inferior to La Bottega Nicastro's. Which brings us to the next stop on our journey: La Bottega Nicastro. This is pretty much THE place in Central Ottawa for Italian groceries and goodness. They're the purveyors of what I like to call the "Two Day Sandwich", which is your choice of bread, meat and cheese, the bread selection including an utterly delectable whole wheat focaccia, the meats being almost unlimited in selection (I asked for speck, which is a slow-smoked variety of prosciutto, one day - no such luck) and either provolone, mozzarella or Swiss cheese. On top, your choice from onion, hot peppers, black olives, pickled eggplant and tomato. Condiments are mayo, mustard or Dijon, or all three if you're crazy. Why the "Two Day Sandwich"? Because I could never eat the whole thing in one go and would usually save half for the next day's lunch.

La Bottega Nicastro - 64 George St. in Ottawa's Byward Market

But it isn't just the sandwiches. They provide some of the most gourmet food in Ottawa, including a little truffle stand! The place is huge and you can get pretty much anything you need there except fresh produce.


Luckily, when you're in the Byward Market, you're rarely at a loss for produce. There are obviously the fruit and vegetable stalls that populate the area between April and November (depending on weather),  which is where we found the onions and garlic for our meal.

Onions - cheap and plentiful!
We then went to one of our favourite shops for the remaining produce, specifically mushrooms and salad fixins. That shop is the Byward Fruit Market.


Byward Fruit Market - 36 Byward Market Square
This is one of those shops where you're on a first name basis with the owner. And man do they have some awesome produce! I'd never seen morel or wood blewit mushrooms before coming here. So, we picked up some lovely wood blewit, oyster and shitake mushrooms as well as a salad mix (they were out of arugula as the Tuscan Steak Salad recipe had called for).

Next, MEAT!!!


Aubrey's Meats - 59 York Street

For our steaks, we went to long-time butcher shop Aubrey's where they had some absolutely EPIC New York striploins for us, locally raised and tasty as hell. Buying meat there isn't cheap, but you really can taste the difference between what you get at the supermarket and what you get at a good butcher's. We also picked up some Beking's eggs (also local) and Cochrane's milk, fresh in a glass bottle like the old days!

Now, fully loaded with ingredients, it was time to end our little road trip by getting back to the kitchen (or as Kari has dubbed it on foursquare, Cucino del Unicorno). Now, I'll admit I only had to take care of the steak, but the meal was pretty epic all around, except maybe the Tomato Bread Pudding, but mostly because we burned it. Whoops...

So, even though they're available from the links provided above, here are the recipes we made after our culinary trek.

Tomato Bread Pudding (by Michael Smith - Chef at Home)

Ingredients


- 1 loaf of rustic whole grain bread, cut into large cubes
- 2 tablespoons olive oil
- 2 onions, large, peeled and chopped
- 8 cloves garlic, peeled and thinly sliced
- 1 can (28 oz) crushed tomatoes
- 1 cup 35% whipping cream
- 1 tablespoon dried oregano
- 8 ounces grated parmesan cheese
- 2 eggs
- Salt and pepper
- Olive oil

Directions

1.Preheat your oven to 400°F. Put bread onto a baking sheet and toast it in the oven for 15 minutes or so. Remove when it is golden brown and crispy. This adds tremendous flavour and dries out the bread which helps it absorb the pudding mixture. Cool the bread until you can handle it.

2.While the bread toasts sauté the onions in a large skillet with the olive oil. Sauté until softened and golden brown then add the garlic which would burn in the time it takes the onions to brown. Sauté for another few minutes.

3.Pour the tomatoes and onion mixture into a large bowl along with the cream, oregano, cheese, eggs, salt and pepper and whisk well. Toss the toasted bread into the mixture and let it rest a few minutes allowing it to soak up all the liquid. Oil an 8 x 8-inch baking pan and pour the mixture into it. Bake for 40 to 45 minutes. NOTE: DO NOT OVERBAKE! We did and well, look at the result:

Yeah, the top is not supposed to be black. D'oh...


The next item, the Steakhouse Mushroom Stew turned out much better, it was quite tasty. The only drawback with this was that there was so much going on flavour-wise that we couldn't quite taste all the different mushrooms we were using.

Steakhouse Mushroom Stew (by Michael Smith - Chef at Home)
Ingredients


- 1 pound mixed mushrooms, shiitake, oyster, portabello, button and cremini (we added the wood blewits and reconstituted some dry ones
- 1/4 cup butter
- 2 onions, peeled and sliced
- 8 cloves garlic, peeled and sliced
- 1 tablespoon soya sauce
- 1 tablespoon dried thyme
- Freshly ground pepper
- 1/2 cup 35% whipping cream
Directions

1. Trim the mushrooms as needed, removing any tough stems. Cut larger mushrooms into smaller pieces. Smaller mushrooms may be left whole or simply halved to show off their form. Rinse them well then roll in a towel to dry them off.

2. Preheat a large skillet over medium-high heat then add the butter and onions and garlic. Sauté for a few minutes until they’re golden brown. Add the mushrooms and continue. Once they release moisture and become a bit "soupy" add the soya sauce, thyme and pepper. Continue cooking until the mushrooms are tender and most of the moisture has evaporated, concentrating the flavour. Add the cream and stir until the sauce has thickened.

Mmmmm, shroomy goodness!


What REALLY made the meal was the main course. The Tuscan-Style Steak Salad was one of the tastiest mains I've had in a very long time and I'll definitely be using this recipe again:

Tuscan Grilled Beef Salad (by Michael Smith - Chef at Home)


Ingredients


- 1 large striploin steak, 24 ounces or more, 4-inches thick, bone-in if possible (it's pretty hard to find steaks like this pre-cut, so we used a couple of 1-inch thick 10 oz. striploins. As long as you cook them rare to medium-rare, they'll be fantastic.)
- 8 cloves garlic
- 1 tablespoon dried oregano
- 1 bottle of premium extra virgin olive oil
- 1 pound baby arugula, or more (as mentioned, we could only find a spring salad mix, so I'm curious as to what the flavour would be if we used arugula)
- 8 ounces fresh basil leaves (optional)
- 1 lemon, juiced and zested
- Coarse sea salt
- Freshly ground pepper peppercorns
- 8 ounces chunk of authentic Parmigiano Reggiano (we might have used Pecorino instead, it was still DAMN tasty!)

Directions


1.Preheat your favourite grill to high. Meanwhile puree the garlic and oregano with a few splashes of the olive oil. Slather the marinade all over the steak.

2.Once the grill is hot, season the steak with salt and pepper and begin slowly grilling it. Take your time and keep an eye on the grill heat, adjusting to prevent burning. A large steak takes longer to cook as heat penetrates to its center, enough time for the exterior to brown and potentially scorch. Flip as it sears, once it has browned, flip it frequently to further prevent burning. Use your best judgment to gauge doneness. Poking, prodding, pinching, probing even peeking. A meat thermometer works well even a sneak peak at the interior is better than guessing. A piece of beef this large should be cooked to medium rare or rare to maximize its juiciness, well done would be criminal! It may take 20 minutes or more. When it's done rest the steak for ten minutes or so, give the meat a chance to relax and reabsorb its moisture. Pre-mature slicing releases agitated hot moisture that is lost as juice. Rest before slicing.

3.As the beef grills get everything ready for the tableside presentation. Mound the arugula and basil leaves in the middle of a large festive platter. Present the steak to your table on a wooden cutting board with a sharp knife. Once the steak has rested slice it very thinly and arrange the slices around the arugula. Sprinkle everything with lots of olive oil from a special bottle. You may theatrically zest the lemon over the salad then squeeze on the juice. Season with liberal sprinkles of coarse sea sat with lots and lots of freshly ground peppercorns, coarsely ground. Last but not least, using a vegetable peeler, garnish the works with shavings of Parmigiano Reggiano.

Pretty and tasty!
 
 
So, in the end, not every culinary adventure ends up quite the way we expect it. But isn't the journey itself the important part? Or maybe it's a simple matter of this: No day that ends in steak can ever be considered disappointing.
 
 
Till next time! Enjoy!

Apple-y Goodness!


Ah, the humble apple, it's a pretty amazing fruit. It can be grown all over the place, it lasts for months, it has 8 bazillion varieties and it's one of the more chameleonic ingredients a cook can use.

On a recent Saturday evening, what began as a craving for Guinness Stew turned into a spot of spontaneous cooking fun with apples! Kari and I had decided that we were going to go on a shopping trip to pick up the fixins for a hearty stew using beef and Guinness and a few more goodies. First we picked up leeks, carrots and Cortland apples at a Byward Market stall. Not even sure why we decided to buy apples... Maybe Kari can fill in the gaps in her comments.

Next I suggested we pop in to the Sausage Kitchen on the Byward Market for the stewing beef, I'd been quite impressed by it in the past. While there, we caught notice of a product on special: Danish Bacon. I'd never tried it before so the nice fellow at the deli counter gave us a simple. It had a lovely delicate flavour, sort of a cross between back bacon and a subtle ham. So, buying a pound of the stuff was kind of a given. Once we had our ingredients, it was back home for food making!

Now, as we were prepping the veggies, etc. for the stew, we were asking what to do with the apples we had. We decided a few chunks of apple in the stew would be a good idea, but then the juices started flowing. I asked aloud what it might taste like if we wrapped some chunks of apple in this heretofore unknown type of bacon and, oh, I dunno, deep fried them? Kari voiced her agreement and proposed one of her own: rice paper wraps with apple tossed in sesame and lots of other amazing flavours. Yeah, this happens a lot at our house.

And so, we went ahead with making some lovely hors-d'oeuvres while letting the stew simmer away. Here they are!

Deep-Fried Apple-Bacon Bites

Ingredients

- 1-2 hard apples, Cortland or Macintosh work well (or Granny Smith for extra tartness), cut into large chunks (about 1 inch thick and wide) - up to you if you want to peel them or not - you're looking to have 8-12 pieces of apple
- 8-12 pieces of either back bacon or Danish bacon. If you insist on using regular bacon, I suggest cutting each piece in half. You don't need a lot of bacon to cover the pieces of apple.

Directions

Finished product!


- Wrap each piece of apple with a piece of bacon and fix in place with a toothpick. Set aside.
- Heat 2 inches cooking oil in a pot to about 350 F (If you gently dunk a wooden chopstick in the oil and it sizzles, the oil's ready!)
- Cook pieces of wrapped apple for about 3-4 minutes, until bacon crisps slightly (this kind of bacon doesn't crisp up the same way regular bacon does, so don't try too hard to make it crispy).
- Remove from oil and blot on paper towels. Keep warm in 200 degree oven until ready to serve with Slavic Sweet and Sour Dipping Sauce.

Slavic Sweet and Sour Dipping Sauce

- 1/2 cup light sour cream
- 2 tsp maple syrup
- 1 tsp red wine vinegar
- juice of a lemon wedge
- 1/2 tsp smoked paprika
- pinch of salt
- pinch caraway seed (optional)

- Stir all ingredients together and serve.


The other appetizer was Kari's inspired yet simple Apple Spring Rolls. Now, I'm sure you've all had the rice paper wrapped spring rolls at Vietnamese restaurants. Well, these were pretty much the same, but without meat and other ingredients. But they were remarkably tasty in all their simplicity.

Apple Spring Rolls

NOTE: Kari kinda made these up as she went, so these amounts are basically approximations of what amounts I think would work well.

Makes 4 spring rolls

Ingredients

Filling

- 1 Cortland apple, cored, peeled and julienned
- 1 tsp toasted sesame seeds (toast in a frying pan on medium-high heat for about 2-3 minutes before mixing with other ingredients)
- 1/4 cup chopped cilantro
- 1/2 cup vermicelli noodles, cooked and coarsely chopped (optional)

Dressing

- pinch ginger powder
- 1 tsp sriracha sauce
- 1/2 tsp sesame oil
- 1 tsp rice wine vinegar
- juice of 1/4 lime
- 1 tsp soy sauce or fish sauce
- 1/2 tsp hoisin sauce

Wraps

- 4 sheets rice paper, prepared according to package

Directions

Rice wraps with peanut dipping sauce that solidified, so really, spicy peanut butter.
- Mix all filling ingredients together in a ceramic or glass bowl (non-reactive)
- Mix all dressing ingredients in separate non-reactive bowl
- Stir dressing into filling ingredients and mix thoroughly.
- Place 1/4 of filling mixture in a rice wrap and roll tightly. Repeat for remaining rice wraps.
- Serve with hoisin sauce or satay-style dipping sauce (basically melt peanut butter and mix in lime juice and sriracha, toy with it as you like till you achieve desired flavour)


So much tastiness from our humble friend, the apple! 


The funny thing about this little culinary adventure? The stew kind of became an afterthought. We were both pretty full after the appetizer course and it's Guinness Stew, not exactly the most thrilling recipe ever. Tasty? Damn straight it was, but stew is stew is stew. I just don't find it all that thrilling from a "fun with cooking" point of view. Regardless, here's the recipe we used, plus we added a diced apple and a diced potato or two. Enjoy!

Friday, November 4, 2011

What to do with a dead bird

Hi there!

This post might be a bit late for readers in Canada, but maybe it will come in handy for some of my American neighbours. October in Canada means Thanksgiving, which takes place on the second Monday of the month. Inevitably, there is turkey. Lots and lots of turkey... Poor little gobblers.


Now, with turkey comes the age-old question of what to do with the carcass of the ex-bird after all that meat has been carved off. Most people I know make some sort of turkey soup after picking the meat clean. This year, I offered to take the massive bird corpse off my Dad and Step-mom's hands with the idea of making turkey stock (and really, turkey soup is pretty much turkey stock with a few added ingredients). What I ended up with was a lot more than I had imagined!

Well, first up was making the stock. As you may have noticed, a lot of recipes call for chicken broth/stock. Personally, I've never been the biggest stock user, but that's been changing recently. I don't generally like using processed foods, so when I can get my hands on something authentic or make it myself, I will do so. Luckily, a local butcher sells stock by the litre, including chicken and duck stock (I don't remember if they do turkey). But it was fun to try making my own for once, and it was a rather easy process!


Turkey Stock

This is a long process, requiring up to 24 hours. Basically, you break up the turkey carcass as best as possible, shove it all into a pot, add some veggies and seasoning, pour in a bunch of water and simmer it down!

Ingredients

- carcass of cooked turkey, with a good amount of meat left on it, if possible
- 4 stalks celery, roughly chopped
- 1 large onion, roughly chopped
- 3 large carrots, roughly peeled and chopped
- 5 garlic cloves, chopped
- handful of parsley, stems and leaves
- 3 bay leaves
- salt and pepper to taste
- 1 tsp dried thyme
- 1 tsp dried sage
- additional herbs or spices as desired (I added a pinch or two of smoked paprika, because I'm hooked on that stuff like it was crystal meth)

Directions

- Find the largest pot you have and set it on a large burner on the stove. Leave burner off.
- Break down the turkey carcass into as many pieces as you can. Here's where you get to show off your inner barbarian and rip something apart with your bare hands (make sure they're cleaned or gloved)! Place all ingredients into the pot and fill with water until all ingredients are just covered by the water.
- Bring to a boil, then reduce heat to low and simmer for 24 hours. About halfway through, you'll probably need to add more water. You are looking for a liquid, not a stew!
- Run everything through a fine mesh strainer, draining all the liquid into one large receptacle, and putting the solid ingredients into a large bowl.
- After washing your hands or putting on rubber gloves, sort through the solid ingredients to remove all bones and bone pieces (I saved mine for a Halloween costume, but the folks south of the border might not find much use for them!).
- Let the stock sit for an hour or so, allowing a layer of fat to collect on the surface. It'll be easy to tell what's fat and what's stock since the stock will be a rich deep brown while the fat will be yellow. Skim the fat off the surface with a large spoon and discard (unless you have some secret use for turkey fat I don't know about). Stock is now ready to be used for whatever you want!

Meat and stock can be stored in the fridge for up to two weeks, after that you'll want to freeze them. 

So, what you'll be left with is a lot of turkey stock and a lot of meat that has the tender string-like texture of unsauced pulled pork. The meat can be used in all kinds of recipes, but because it's meat that was already roasted and then boiled, it doesn't have a whole lot of flavour. But it'll hold sauce well and can be used to make all kinds of dishes, just make sure to add a lot of seasoning.

Because of the similarity to pulled pork, I made a Cranberry BBQ Sauce and mixed it all together, heated in the oven and it was some pretty awesome sandwichery! So, hey, let's get a recipe for that!

Cranberry BBQ Sauce (for Pulled Turkey Sandwiches)

Ingredients

- olive oil
- 3 cloves garlic
- 1 cup high-quality ketchup
- 2-3 drops liquid smoke

- 1 cup fresh cranberries
- 1/4 cup cider vinegar
- 3 tbsp Worcestershire sauce
- 1/2 cup brown sugar
- 1 tsp smoked paprika
- 1/2 tsp salt
- 1/2 tsp ground black pepper
- pinch ginger powder
- pinch dried sage
- 1 tsp hot sauce
- 2 tsp molasses
- 1 tsp maple syrup
- 1/2 tsp honey

Directions

- In a small or medium saucepan, heat oil on medium-high and sauté garlic.
- Add all ingredients except molasses, maple syrup and honey and bring to a boil. Stir sauce often.
- Reduce heat to low and simmer for 20-30 minutes. Stir in molasses and maple syrup and simmer for another 5 mins.
- Add honey and simmer for another 5 mins. Remove from heat.

To make sandwiches, mix 3-4 tbsp of BBQ Sauce with about a half cup of meat in a saucepan and heat through. Add more sauce as needed. Serve on buns, bread, whatever and top how you like it. If you have some leftover stuffing and/or coleslaw, that would the perfect compliment!

Kari also made a stew/chili using corn, potatoes, onion, garlic and arbol chillies, but she lost the recipe... Oh well! Basically, cook that stuff in a pot with meat and stock until it's what you want to eat. There, easiest recipe ever!

So, with Thanksgiving coming up in the US and maybe some of you Canucks wondering what to do with the carcass in the freezer (if it's in the fridge, throw it out, the time has passed), well, now you know!

Enjoy!