Saturday, April 26, 2014

Let's Go Crazy! - Part 3: Tacos

Hola!

Alright, I'll admit it, tacos are already an excuse to go crazy. I've seen lamb, pulled pork, sashimi grade fish, steak, even ox tongue in tacos, but I've never really done them myself. But I've always wanted to have fun making some sort of over-the-top taco creation. I just didn't realize I was going to give myself the opportunity so randomly.

What began as an on-the-spot pick-up of frozen haddock at the grocery store somehow ended up as a foray into the decadent world of fried chicken. I'll explain: Kari and I have been on "fresh and light" kick for dinners lately and I bought the fish with the goal of making a light fish taco loaded with veggies. But then Thursday, April 3 happened. As mentioned in a recent post, I made some tasties for the "Capital SuccessFest" to help Ottawa's own Lefty McRighty with his legal woes against Voldemort. Well, attendance led to imbibance which led to hungoverness. And from said hungoverness came a powerful, POWERFUL craving for fried chicken, so fish tacos suddenly got conceptually usurped by Fried Chicken Tacos. Now, it took an extra day to implement, but I'd planted the seed and there was no way Kari was going to let me off the hook without deep fried goodness. So, Fried Chicken Tacos it was! I will declare that we showed a modicum of restraint in that we stuck with the "lots of veggies" idea by making a slaw, a variation of a pico de gallo, and refried beans.

Now, I've never made fried chicken before, generally avoiding deep frying as a "go-to" form of cooking, but it really isn't that hard (messy, yes, but not difficult); and there are few things in this world as delicious as fried chicken. I've watched enough food pr0n TV and read enough cookbooks to have learned a few tips on how to pull it off and there's always the Internet for tips.

Additionally, the sides/toppings (slaw, pico and beans) were all fairly straightforward and uncomplicated. So while this might look like a recipe concocted by a madman, and maybe it is, since I've never heard of putting fried chicken on a taco (although it's probably totally a thing in Mexico), it wasn't actually that hard to do.

So let's do this thang!


Fried Chicken Taco

There's all kinds of fun things going on here, with lots of crunchy elements from both the veggies and the chicken. Let's start with the main building block of the dish, the chicken:

Fried Chicken

Ingredients

Marinade

- 2 boneless, skinless chicken breasts, cut into 1-inch, 3-inch long strips
- 2 cups buttermilk
- 1/4 cup taco sauce (such as Valentina Salsa Picante)

Coating

- 2 cups flour
- 1 tsp chili powder

- Canola oil for frying

Directions

- In a large non-reactive bowl, mix buttermilk and taco sauce together.
- Place pieces of chicken in milk mixture and let sit for an hour or so.
- Fill a large, deep pan with about an inch-deep layer of oil. Heat on medium-high heat until ready to fry chicken (to test if oil is hot enough, let a drop of water fall into the oil; if it sizzles, it's ready to use)
- While oil is heating, mix flour and chili powder in a bowl or high-edged plate or some other container that won't make a mess as you hand-coat your chicken!
- To coat chicken, do the following for each piece: let excess liquid drip off, coat in flour mixture, shake off excess flour, soak in milk mixture again, let excess liquid drip off, coat in flour a second time and shake off excess. You *could* just coat the chicken once, but I find it way crunchier with two coats.
- Fry the chicken in batches. Don't crowd the pan, and cook until coating is golden and crispy, and chicken floats.
- Remove chicken from oil using a slotted spoon and dry on paper towels to remove all excess oil. You want your chicken crispy, not oily. Set aside in oven at 200 degrees to keep warm.


Isn't it a gorgeous sight?


Now we build up our supporting cast with a pair of tasty veggie toppings. First, the Pico de Gallo:

Pico de Gallo

This is your standard Pico de Gallo with a little bit of cucumber added in for extra flavour and freshness.

Ingredients

- 1 tomato, diced
- 1 jalapeno pepper, finely diced
- 1 small cucumber, finely diced
- 1 small onion, finely diced
- 2 tbsp cilantro, finely chopped
- juice of 1/4 lime
- salt and pepper to taste

Directions

- Mix ingredients well and chill for an hour.


Healthy component #1


Moving along, now we have the Southwestern Slaw. Originally intended to be a side

Southwestern Slaw (recipe taken from Allrecipes.com) (I omitted the onion since there was already onion in the pico de gallo and beans)

Ingredients

Slaw

- 3 cups cabbage, shredded (we used napa cabbage, but any will do)
- 1 carrots, peeled and grated
- 1 red pepper, seeded and julienned
- 1 jalapeno pepper, seeded and finely diced
- 2 tsp fresh cilantro, finely chopped

Dressing

- 1/2 cup canola
- 2 tbsp cider vinegar
- 1 tbsp sugar
- 1 tsp cayenne pepper
- 1 tsp lime juice
- salt and pepper to taste

Directions

- Mix all veggies in a large bowl.
- Whisk together dressing ingredients until sugar is dissolved
- Mix dressing with vegetables and set aside for at least an hour to let flavours blend.


Healthy component #2


Refried Beans

Ingredients

- 2 tbsp olive oil
- 1 small onion, finely minced
- 3-4 cloves garlic, minced
- 1 796 ml/28 oz. can black beans
- 1 cup chicken or vegetable stock
- 1/2 cup beer (optional)
- juice of 1/4 lime

Directions

- Heat olive oil on medium-high heat and sauté garlic and onion for 3-4 minutes.
- Stir in black beans and stock and reduce heat to medium. Keep stirring and mash the beans with the flat of the spoon. You don't want to turn this into a smooth purée, but rather a more "rustic" texture.
- As the beans cook and absorb the stock, they can sometimes dry out a little. The beer is there in case that happens; stir it in to re-moisten your beans. It also makes it tastier!
- Once beans have cooked to your taste, stir in lime juice and remove from heat.

Healthy component #3 (well, maybe not with the beer)

To put it together, spread a schmear of refried beans on a flour tortilla (preferably heated for 5 minutes at a low temperature - 200-225 degrees Fahrenheit - but I went with cold because I always forget my tortillas and they become Mexican crackers), then add your fried chicken (1 or 2 pieces depending on tortilla size and appetite), then top with pico, slaw and, if you want, some kind of hot sauce or salsa. I like the Valentina Salsa Picante mentioned above, which is pretty much a straight-up taco sauce. If you're a big cilantro fan, you can always add a couple of sprigs to the taco, but there's already some in the slaw and the pico, so keep that in mind.
 
Grab taco with hands and snarf!
 

So much good!


So, after all that, how'd it turn out? Well, as one might expect, the star of the taco was indeed the fried chicken; I could have eaten the taco with just the chicken and taco sauce and been a happy camper. As I suspected, double-coating it made it super crunchy while keeping the chicken nice and moist, with the buttermilk/taco sauce combo providing a nice tangy quality.

That being said, having all those veggies did help the experience as I could feel my arteries NOT hardening after every bite... Nothing amongst the three of them really stood up and said WOW! to me, but they played their roles well: the pico giving a fresh pop, the slaw adding some acidity and crunch and the refried beans rounding out the taco with a rich earthiness.

So really, I think I've discovered an important lesson: fried chicken, whether it be served at home or in a local eatery, is pretty much as crazily delicious a food as there can be. But also likely to cut short your lifespan, so be responsible! Only YOU can prevent a life filled with fried chicken! (now, the quality of said fried-chicken-free life might be up for debate...)

Enjoy!

Sunday, April 6, 2014

Authentic Greek (by way of my Mom)

Well hello there!

I wrote a post nearly 3 years ago about how amazing a cook my mother is, intending to create an entire series of posts based on me attempting to recreate her culinary touchstones. Turns out I didn't get past the appetizers... Truth be told, I don't cook many of the things I grew up eating, mainly because I prefer trying new things. Heck, I don't even make my "standards" much anymore (like my Chili and my Beef-Sweet Potato Curry or my Chicken Burritos), again because I always want to try new things.

But sometimes my taste buds cry out "Go back! Baaaaaaaaack to times long agooooooooooo..." For the longest time, they've been wanting to go back to a stew my mother made when I was younger, the recipe for which, I just recently discovered, she acquired on a trip to Greece in the late 80s. It was so tasty; full of bright tomato and onion flavours boosted by salty feta and juicy shrimp. I hadn't had it in years and I was getting antsy! Well, luckily enough, opportunity presented itself recently and unintentionally, as it usually does with cooking in our house.

It started with Kari going on a casserole kick, which included a Greek-themed casserole with orzo and feta. But for some reason, upon re-reading the recipe, she decided it might not be good, so I stepped in with the idea that, if we got some shrimp, we could make my Mom's old recipe!

So, I called my mom, she sent the recipe along, and we were off. Turns out that this meal of succulence is also really freaking easy to make!


A taste of teenagehood


Shrimp-Feta Stew

Ingredients

- 1 28 oz. can diced tomatoes or 3-4 fresh tomatoes, diced 
- 1 lb. shrimp, peeled, de-veined and tails removed
- ¼ cup olive oil
- 1 medium onion, finely sliced
- 4 cloves garlic, minced
- Salt and pepper to taste
- 1 cup white wine
- 1 tbsp fresh parsley
- ½ tsp dried oregano
- 3 oz. feta, cut into 1/4 inch cubes


So much goodness in one pot


Directions

- In saucepan, heat oil, sauté onion and garlic for 5 mins.
- Add all but shrimp, bring to boil, reduce, simmer for an hour
- Add shrimp and cook through
- Reduce heat to low and stir in cheese
- Serve with over pasta on its own with a really good loaf of bread (or nothing) and a nice light white wine, preferably Greek (although we went a Sauvignon Blanc, maybe Australian...?)

Now, this is probably a very heart-healthy and light meal, but not once you throw in half a loaf of bread, which can easily happen as you try to sop up every last drop of sauce, because it's THAT FREAKIN' GOOD! So, I caution a little carbohydral restraint.

But yeah, make this, trust me. So good.


Wednesday, April 2, 2014

Free Lefty! - Bacon and Bourbon Shortbread

FREE LEFTY!!


The world is full of jerks, it's an unfortunate truth.

Case in point, one of Ottawa's cornerstones of interesting music, Lefty McRighty, is being sued by a certain music promoter for some stuff he wrote that may or may not be absolutely bang-on. I'll let the media handle the details. Point is that sometimes good people get caught in the flotsam of not-so-good events and they need a little help from their friends. So, in order to help Lefty out with possible legal fees, there's a fundraising event taking place April 3 at the Rainbow Bistro in Ottawa. Part of the fun will be a bake sale, and yours truly decided to try his hand at creating something delicious to help out.

So, I decided to make Bacon n' Bourbon Shortbread, which is essentially a compilation of some of favourite foods in cookie form. First off, I made this shortbread recipe from AllRecipes.com:


Shortbread

- makes about 2 dozen cookies

Ingredients

- 1 cup butter, softened
- 1 1/2 cups flour
- 1/4 cup corn starch
- 1/2 cup confectioner's sugar (icing sugar)

Directions

- Preheat oven to 350 degrees Fahrenheit (the original recipe says 375, but it lies).
- Using an electric mixer, whip butter till fluffy. I let it run on medium speed until the butter took a whipped cream texture. This takes about 10 minutes, but you may have to stop to take a spatula to scrape the butter back into the centre of the mixing bowl.
- Add the dry ingredients and beat into butter with mixer for 1 minute at low speed, then on high speed for 3-4 minutes.
- Drop about 1 tbsp of cookie dough per cookie onto a cookie sheet lined with parchment paper, and say cookie one more time, for fun.
- Bake for 10-11 minutes (again, the original recipe lies), until edges are golden.
- Remove from oven and gently(!!) move each cookie onto a wire rack to cool.


Step 1 - COOKIES!!


The next step in this trip down bake sale lane is to put something amazing on top. And when I think amazing, I think BACON! So, using this time-tested method, I developed a tasty cure for a whack of pork belly:

Free Lefty Bacon Cure

Ingredients

- 1 tbsp pure vanilla extract
- 1/3 cup kosher salt
- 1/2 cup brown sugar
- 2 tbsp maple syrup
- 1 tsp ground chipotle pepper
- 1 tsp ground guajillo pepper

Directions

- Smear the sure all over the pork belly and cure it for a week.
- Rinse cure and smoke over maple charcoal and apple wood chips for 4 hours at 225-250 degrees Fahrenheit.
- Fry up finished bacon and slice up into bits that can top a cookie.

Step 2 - BAYKUNNN!!!!

Next up, we needed to find something to affix the bacon to the cookie, and I got the eureka moment to use my recent crazy invention of Bourbon Caramel to do the job!


Step 3 - Currrrrrrmelllll

Once the caramel was cool, I drizzled it on each cookie and then topped each one with a pinch of bacon and drizzled a little bit more caramel on top. After the whole thing settled into place, I sent it off with my friend. But that's ok! If you show up at the Rainbow tomorrow, you'll be able to sample some of this goodness:


Tasty treats! 


Also, on top of that, kickass bands and hot burlesque ladies! What's not to enjoy!

So with that in mind, here's hoping I get at least one ass through the door with this post.

Cheers!


Sunday, March 23, 2014

Let's Go Crazy! - Part 2 - Pizza

Hey there!

Ok, we all love pizza, don't we? I mean it's pretty much on everyone's top 10 list of favourite foods. What's not to love? There's cheese, there's delicious tomato sauce, there's the crust (which, when done right, can be the best part of the pie) and there are all those wonderful toppings (especially when bacon's involved). One of the things that makes pizza pizza is its reliability. As a very lousy actor said in a very bad film (albeit with a memorable line): "Sex is like pizza: even when it's bad, it's still pretty good."

But what about when you want to break away from reliability? What about when you decide you need to top your pizza with MADNESS?!?!? For me, it started with my darling wife buying a smoked duck breast. We bandied about ideas for how to serve this dish for a while, but nothing seemed to come together. We then remembered that we'd used smoked duck breast once before for an appetizer we'd served at Christmas, which was basically crackers topped with a fig compote, slices of smoked duck and baby arugula. So, DING! it came together from there: We'd make the compote instead of using tomato sauce, then add the duck, mushrooms, tomatoes and cheese. See? It's a meal fit for this guy:


"Bon appetit! HAHAHAHAHAHAHAHAHAAA!!!"

One of the best parts of this descent into Arkhamian levels of culinary depravity is that the pizza dough is actually quite easy to make and only takes about 30 minutes to put together. And yet, it's quite tasty and turns out with a light and crispy texture at the bottom, but still a nice chewy texture throughout the "body" of the crust.

Quick Pizza Crust

Ingredients

- 1 package dry yeast (.25 oz package)
- 1 tsp white sugar
- 1 cup warm water
- 2 1/2 flour (unbleached or whole wheat)
- 2 tbsp olive oil
- 1 tsp salt

Directions

- Preheat oven to 450 degrees Fahrenheit
- In medium bowl, dissolve sugar and yeast in warm water. Let stand for 10 minutes until creamy/foamy.
- Stir in flour, salt and oil; mix well, forming a solid, but somewhat fluffy ball of dough. Try not to overwork dough or it will be tough.
- Turn dough out onto a lightly floured surface, roll in flour then pat into a round or square pizza shape, or use a rolling pin, but try not to make the crust too thin, unless you want a thin-crust pizza!
- Spread Pizza Sauce (see later) on crust, smoked duck breast, mushroom slices, tomato slices and blue cheese. We also topped it with rind pieces of Parmesan cheese, but that didn't turn out super-well. If you really need to have Parmesan on there, I suggest grating some once the pizza is cooked.
- Cook pizza for 15-20 minutes until crust is golden.

Ready for oven lovin' 


Fig, Plum and Port "Pizza Sauce"

Ingredients

- 1 tbsp. olive oil
- 2 cloves garlic, minced
- 1 tsp fresh ginger, minced or 1/2 tsp dried ginger
- 1 shallot, minced
- 2 small or 1 large plum, pitted and chopped
- 3 dried figs, roughly chopped
- 1/4 cup port (use the cheap stuff for cooking)
- 1 tsp dried thyme
- salt and pepper to taste

Directions

- Heat oil on medium-high and saute garlic, ginger and shallot for 2-3 minutes.
- Stir in plum and figs and cook for another 2-3 minutes.
- Stir in port and seasonings, bring to a boil.
- Reduce heat to low and reduce sauce for 20 minutes, until it's the same consistency as pizza sauce. Allow to cool slightly and use like you would pizza sauce!

Pizza Sauce's fruity sister

All in all, using a fruit compote of sorts as the base for this dish was something of a stroke of genius. It gave a nice sweet undertone to compliment the smoky saltiness of the duck and the pungency of the blue cheese, while the mushrooms and tomatoes rounded out the pie with more traditional pizza flavours. To be honest, it was one of the most awesome pizzas I've ever had, but smoked duck is pretty hard to beat as far as toppings go, so there's a bit of single-ingredient bias going on...  

Not your mama's pizza pie!


So there you are, pizza madness like nobody's business! 

Sunday, March 16, 2014

On the move! - Part 2

Hello!

Back again with the second part of recapping the first week in our new house and demonstrating how to make great meals while having half your stuff in boxes. As I look at Part 1, I realize I might have been a bit wordy. Well, it's been two months since we *actually* moved, so maybe I need to get off my arse and finish writing about this! Here goes!

- Saturday: Stuffed Meatballs with Tomato Sauce

On Saturday, there was a craving for Italian goodness borne of a craving for meatballs. But being us, mere meatballs would not suffice; they had to be STUFFED meatballs. That idea led a visit to Parma Ravioli where we acquired a loaf of foccacia and bocconcini balls. Now, having never made meatballs before and still scrambling to unbox the kitchen in full, this might have been a daunting task. Luckily, after a few searches around the Internet, I happily discovered that this stuffed meatball idea isn't too difficult to set in motion, as long as you keep it stripped down (a lot of the recipes I saw were a bit overdone, and coming from me, that's saying something)

Meatballs

Ingredients

- 1 lb. ground beef (medium or lean)
- 2 tbsp chopped parsley
- 3-4 cloves garlic, minced
- 1 cup breadcrumbs
- 1 egg
- 12 bocconcini balls, patted dry

Directions

- Preheat oven to 400 degrees Fahrenheit
- Mix all ingredients but the bocconcini balls together in large bowl.
- Take a portion of the meatball mix, about 4 cm diameter, and form around a bocconcini ball. Make sure you seal the meatball well, otherwise, the cheese will leak all over the place when you cook them.
- Place meatballs in a large ovenproof dish, such as a lasagna pan and bake in oven for 20-30 minutes until cooked through and cheese is melted.


Stuffing...


... and balling!

While the Meatballs are cooking, whip together the Tomato Sauce!

Tomato Sauce

Ingredients

- 2 tbsp olive oil
- 2 large tomatoes, finely diced
- 1 small onion, minced
- 2 ribs celery, chopped
- 1 medium-large carrot, peeled and chopped
- 2-3 cloves garlic, minced
- 1 tsp dried basil or 1 tbsp minced fresh basil
- 1/2 tsp dried oregano
- salt and pepper to taste
- liquid as needed: either chicken stock, veggie stock, red wine or white wine. Try to avoid using water since it usually drains flavour.

- Heat olive oil on medium-high and sauté tomato, onion, celery, carrot and garlic for about 4-5 minutes.
- Add seasoning and liquid, stir thoroughly and reduce heat to medium-low.
- Simmer sauce for about 20 minutes, till it thickens.

To Serve

- Arrange 4-5 meatballs on plate. Top with tomato sauce.
- Using a vegetable peeler, peel Parmesan cheese shavings onto meatballs (or use grated Parmesan). Garnish with fresh basil or Italian parsley.
- Serve with green salad and bread. For this instance, we used a lovely foccacia, sliced into long, dipping-sized pieces and served alongside a mix of olive oil and balsamic vinegar for dipping.


Not a bad way to spend the first Saturday in your new home

Verdict? I make pretty kickass meatballs! The key to this one is in its simplicity; the flavours were clean and basic - it tasted like meat, cheese, tomatoes, herbs and garlic. What else can you ask for? Seriously, I think I'm a convert to the mono-meat meatball. All too often, meatballs ask for a mix of pork, beef and veal, but I found that using just beef made for one tasty ball. Having melty cheese inside didn't hurt either...

- Sunday: Pizza

Alright, alright, after this many days of cobbling meals together, it was time to seek out the bountiful goodness of the neighbourhood pizza joint. Luckily for us, there's one right on the corner! Anthony's Pizza at Hinton and Wellington is a spiffy place serving up some very rustic and delicious pizzas and calzones. 

- Monday: Pot Roast

By Monday, we had the kitchen fairly organized, but we still managed to find a recipe for pot roast that uses one dish (a dutch oven) and that's all. Our good Greg (aka Lefty McRighty) put this up on facebook and raved about it. As a result, I had to give it a try, especially after finding a lovely Angus roast on sale at Saslove's. Look it up here, drool and love it! It was AMAZING!


MEAT BUTTER (topped with veggies)!
Well, that's another look back at "Moving n' Cooking". Hopefully, I don't have to do this again for a while. 

Cheers!


Saturday, March 1, 2014

Let's Go Crazy! - Part 1 - Dessert

Hi there!

While I probably need to lose 20 pounds to feel like I'm not gigantic these days, it doesn't stop me from going a little overboard in the kitchen every so often. I can't help myself, I'm a loonie sometimes. To be fair to myself, when you look at cooking as an art form, and I do, well, sometimes you want to write the Great Canadian Novel with your spatula. Unfortunately, it's hard to do that without being a little calorie-indulgent because, let's face it, the tastiest things are usually *not* the lightest. So with that, I'll be taking a few posts to look at some of the crazier recipes I've made recently.

Being a grown-up, I'm starting with dessert, so there, neener-neener-boo-boo. It was one of those quiet Mondays at home: baby Olivia was asleep, WWE Raw was on the tube (I'm a wrestling nerd, deal with it) and Kari and I had just enjoyed a lovely dinner of Jambalaya. But dammit, I wanted something dessert-y. I'm not sure *how*  brownies came to the table, but once they'd been suggested, that was that, I was making brownies! I've made brownies once before, I think, but it had been a while, mainly due to my aversion to baking - there's something about the precision and inflexibility of it that scares the bejeezus out of a free-form culinary thinker like myself. That being said, there are forms of baking that are a little more forgiving than others and brownies are one of them; you can botch a recipe slightly and still have pretty tasty brownies. Do that with a loaf of bread and you're screwed.

As for the brownies, I was inspired to shake things up a bit by the beer I was drinking which had a fantastic richness and depth and wanted to add some grown-up flavour to dessert. So BOOM! Let's get to 'er!


Beer and Bourbon Brownies

Oatmeal Stout Brownie


Basically, I made this recipe, except I added walnut pieces and Smoked Oatmeal Stout from Trafalgar Ales and Meads. But I'll reproduce it anyway:

Makes 12 brownies, or 2 servings of ridiculous gluttonous decadence...

Ingredients

- 1/2 cup butter
- 1 cup sugar
- 2 eggs
- 1 tsp vanilla extract
- 1/3 cup cocoa powder (best quality you can find; I used the PC Black Label Cocoa Powder)
- 1/2 cup flour
- 1/4 tsp salt
- 1/4 tsp baking powder

Added bonuses:

- 1/4 cup walnut pieces
- 1/2 cup Smoked Oatmeal Stout beer (or some other inferior dark beer)

Directions

- Preheat oven to 350 degrees F (175 degrees C). Grease and flour an 8-inch square pan.
- In a large saucepan, melt 1/2 cup butter. Remove from heat, and stir in sugar, eggs, beer and 1 teaspoon vanilla. Beat in 1/3 cup cocoa, 1/2 cup flour, salt, walnuts and baking powder. Spread batter into prepared pan.
- Bake in preheated oven for 25 to 30 minutes. Do not overcook. NOTE: using the beer made the brownies a little bit moister than brownies are, traditionally. They were a little bit more like a cake/brownie fusion. If you want a "drier", more traditional brownie, bake an additional 5 minutes.

Hey look, I baked something!


Now, as you may have noticed if you checked the link, the original recipe calls for a simple chocolate frosting. I, however, made a Bourbon Caramel to top it, because I'm insane and want all the sugar and booze. Also, while baking might be an exact science, caramel's a little more loosey-goosey. Basically you cook up sugar and butter with a few other flavours and it usually turns out pretty damn tasty.

Bourbon Caramel

Ingredients

- 1/4 cup butter
- 1/4 cup bourbon
- 1/4 cup dark brown sugar
- 1 tsp vanilla extract

Next stop, a shot glass... (kidding... not kidding)


Directions

- In a saucepan, melt butter on medium-high heat.
- Stir in sugar and bourbon and bring to a boil. Add vanilla.
- Turn heat down to medium and keep stirring until caramel thickens.
- Remove from heat and let cool for about 10 minutes.
- Spread caramel over brownies.


The finished product and a reminder that I need a new camera, because the phonecam isn't doing the trick.

Now, if you're smart, you'll wait for the brownies to cool for a half hour before digging in. If you're me, you have one right out of the pan...


... and then, whilst the sugar demons of boozy-chocolate-caramel-awesome-ohgodthatssofrakinggood are having an orgy of blissful flavour-sex in your mouth, decide to grab the pan and a fork and eat two-thirds of it with your wife before anything has a chance to cool down... Oops.

Needless to say, these are some tasty, tasty brownies, but the real star was the Bourbon Caramel. I'm going to start putting that on my toast. And in my coffee... and maybe bring a jar to take spoonfuls from during the day... Now excuse me while I go buy a muumuu...

And there you have it! Just one way you can lose your mind in the kitchen! Don't worry, this is series is by no means over yet. Just. You. Wait. *insert ominous evil genius music* Mwa-ha-ha-ha-haaaaaaa!!!!!!

Cheers!

Tuesday, February 18, 2014

On the Move! - Part 1

Hi there!

January 15, 2014 marks the second time I've moved since I started the blog. Back in 2011 I wrote a post about how cooking right after a move. Last time, we made quesadillas with just a knife and frying pan... and, y'know, cheese, sausage, tortillas and so on... This time, I kicked things up a bit more, using a few more tools and ingredients, but the point is the same: just because you're living out of boxes doesn't mean you have to eat crap or contant takeout. What's even better is when you move to a neighbourhood that has a number of amazing food shops. We moved right close to Wellington Street and are just a few blocks away from the corner of Wellington and Clarendon, which houses several wonderful shops, including Herb and Spice for produce (although they can be hit and miss), Saslove's for meat, Parma Ravioli for pasta, other Italian goodies and remarkably tasty pies, Three Tarts bakery for treats and the Ottawa Bagelshop and Deli for bagels as well as all kinds of fun gourmet foodstuffs. Needless to say, we've been eating well. But, for the first few days, we were pretty damn low on cooking implements and cobbling together a decent meal when you only can find a single frying pan and a spatula, if you're lucky, can be kind of difficult. So, with that in mind, we're going to take a look at the first week of eating at Novo Casa del Unicorn over the next couple of posts.

- Wednesday: Moving Day! OK, no one should have to cook on Moving Day. With luck, you have access to a good restaurant in the nearby vicinity and can toddle off there, but if you're like me and have a little one, you can't just head out. Luckily we had Kari's mom who brought us a  delicious lasagna and Caesar Salad.

- Thursday: This was day one of living in the new neighbourhood and we found ourselves wandering to the local foodjobbers. We wanted to put together something simple and filling, so we made our way first to Saslove's to figure out some kind of meat. We settled on their sausages made with Beau's beer, but we didn't know where to find hot dog buns, so I thought "Well, we'll just cut the sausages in half and just serve 'em on kaisers." Turns out that cutting a sausage in half kind of ruins the casing and makes it more like a pile of ground beef. So, I came up with what I call "Sloppy Beau's": Basically it was a mix of sausage meat, beer, onions, chopped tomatoes, cheese and other stuff cooked in a frying pan and served on buns... I honestly don't remember how it came together, but it was easy and tasty!

- Friday: Salmon w. Spicy Orange Sauce with Sweet Potato and Edamame Salad

Alright, this is the first true "recipe" that I wanted to post. After two days of pretty heavy meals, I wanted to make something a lot lighter. After taking a stroll west to find foodstuffs, we now ventured eastwards to see what there was to find. We found a small fishmonger in our travels and I picked up a nice hunk of sockeye salmon.

By this time we'd managed to uncover our box of oils, vinegars, cooking booze and whatnot. We were still missing most of our spices, but was able to uncover a shaker of Chinese 5-Spice Powder. Also, in preparation for cooking future meals, we'd brought all our fridge items in a couple of coolers on moving day, so at least we had juice and sauces and other fridge items with which to work.

So, I put together a quick recipe for a sauce and decided to pan fry the fish while the sauce was cooking up on the side of the pan. We also happened to have a sweet potato and some edamame in the fridge and a bit of cilantro. It all came together on the fly, but that's how it goes a lot of the time.

Salmon:

Ingredients

- 1 lb. salmon, cut into 2 equal portions
- 1/2 tsp sesame oil
- 2 cloves garlic, minced or crushed
- 1 cup orange juice, more as needed
- 1/2 cup cooking wine (Shaoxing wine or dry sherry)
- 2 tsp fish sauce
- 1 tsp soy sauce
- 2 tbsp maple syrup
- 1 tbsp sriracha
- 1 tsp Chinese 5-Spice Powder

Directions

- Heat oil in large pan at about 6-7, add garlic and sauté for a minute or two, stirring frequently.
- Add orange juice, wine, fish sauce, soy sauce, syrup, sriracha and 5-spice powder
- Place fish in the middle of the pan. This should displace the sauce to the side of the pan; this is a good thing!
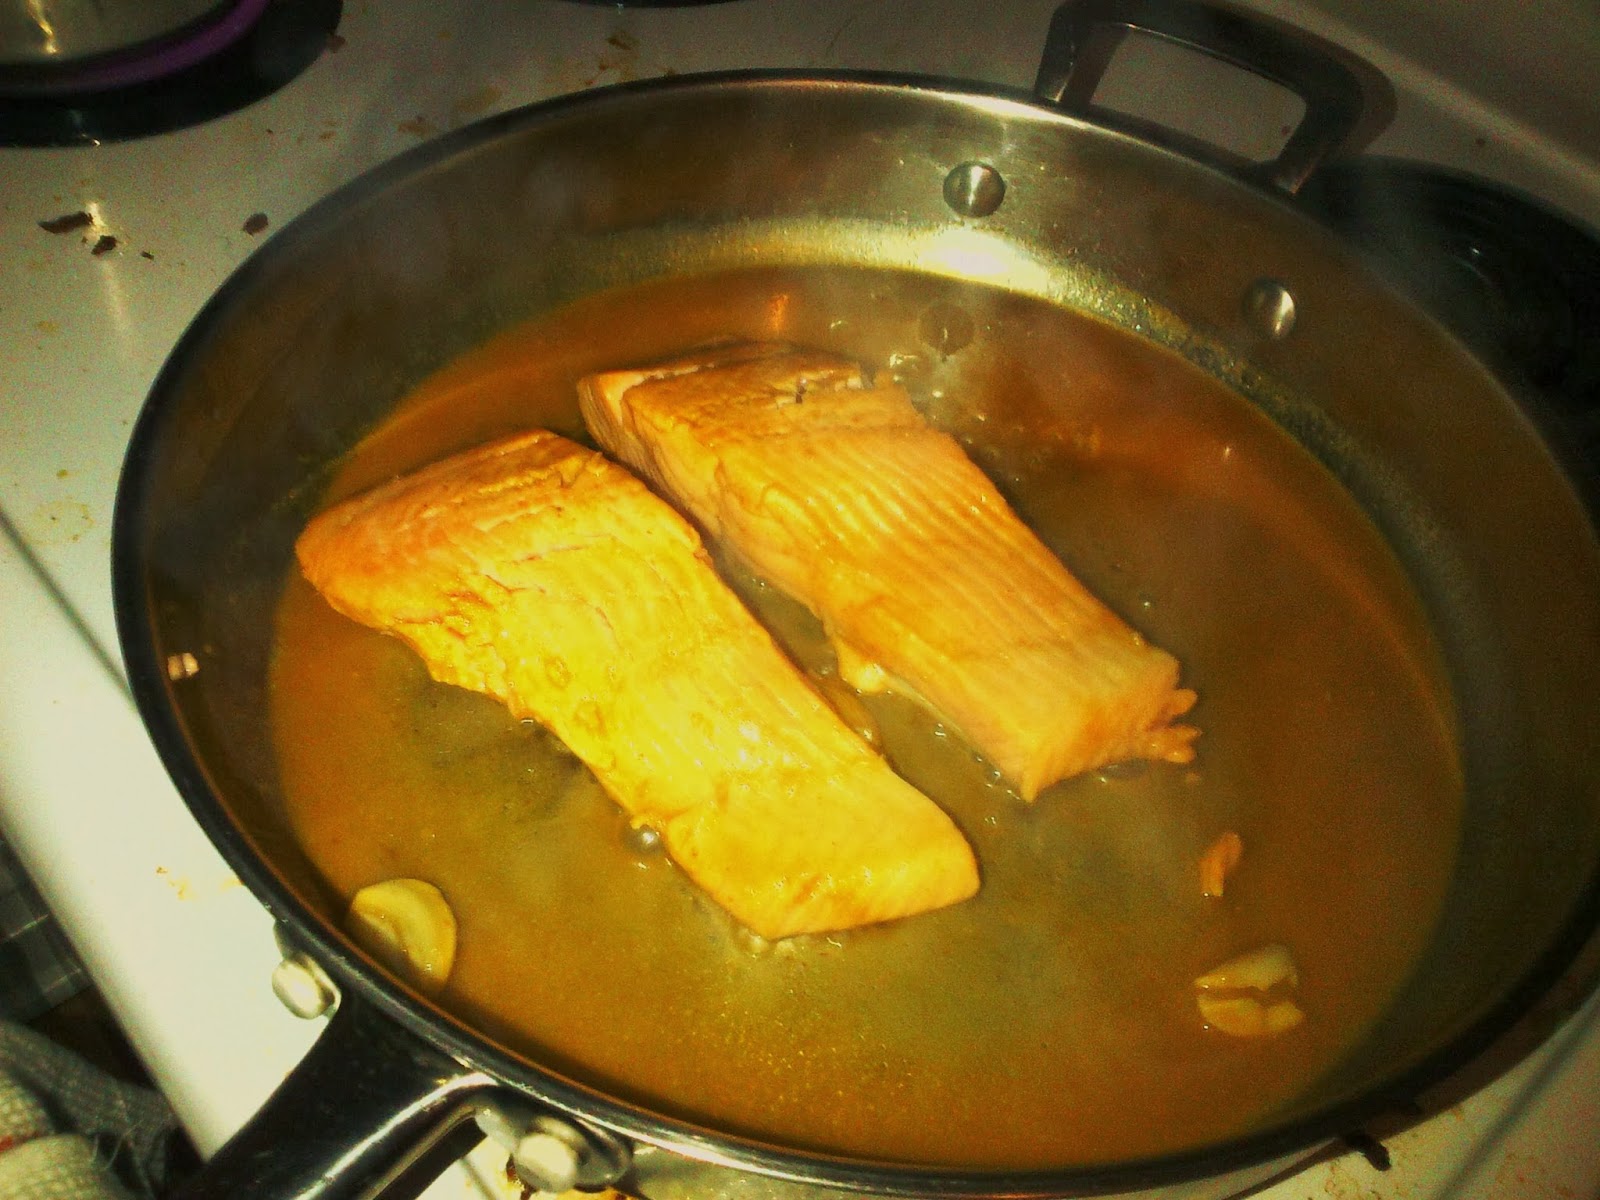
- Get the sauce boiling on the side, while occasionally spooning some onto the fish. Cook the fish skin side down for about 7-8 minutes. The fish will partly pan fry, partly steam from the sauce.
- Carefully flip the fish over with a spatula and cook again for about 5 minutes. Flip back over and serve. You may want to discard the skin. I personally like the skin, but not everyone does. Top the fish with the rest of the sauce and serve with salad.


Equal parts braising, pan frying and steaming - bryming?

Salad:

Ingredients

- 1 large sweet potato, cubed
- 1/2 cup edamame (peeled) or 1 cup edamame (unpeeled)
- 1/2 cup cilantro, chopped

Directions

- Boil sweet potato until fork tender, but not mushy (about 10-15 minutes). Drain in a colander and cool with water. Drain well.
- Peel edamame if necessary.
- Combine sweet potato, edamame and cilantro in a large bowl.

Dressing:        

Ingredients             

- 2 tbsp sesame oil
- 1 tbsp sriracha
- 1 clove garlic, minced
- 1 tsp soy sauce
- 1 tsp rice wine vinegar
- 1 tsp maple syrup

Directions

- Whisk everything together and toss with salad and serve.


Orange and tasty!


The result was pretty darn tasty and very bright, not surprising considering how prominent the orange juice was in the sauce, spicy but not overpowering. The fish was a little bit overdone for my taste (salmon is supposed to rare in the middle), but that was mainly for Kari's benefit since she isn't a big fish eater, and really, even then it was tender and delicious. The salad also added a bit of richness to cut the acidity of the sauce, rounding out the dish very nicely. All in all, it was a great way to brighten up a cold winter's night and have a nice post-move dinner that isn't too difficult.  
 
We'll pick this up next time with meatballs, pizza and pot roast!

Cheers!