Showing posts with label ribs. Show all posts

Sunday, July 28, 2013

RIBFEST!!!


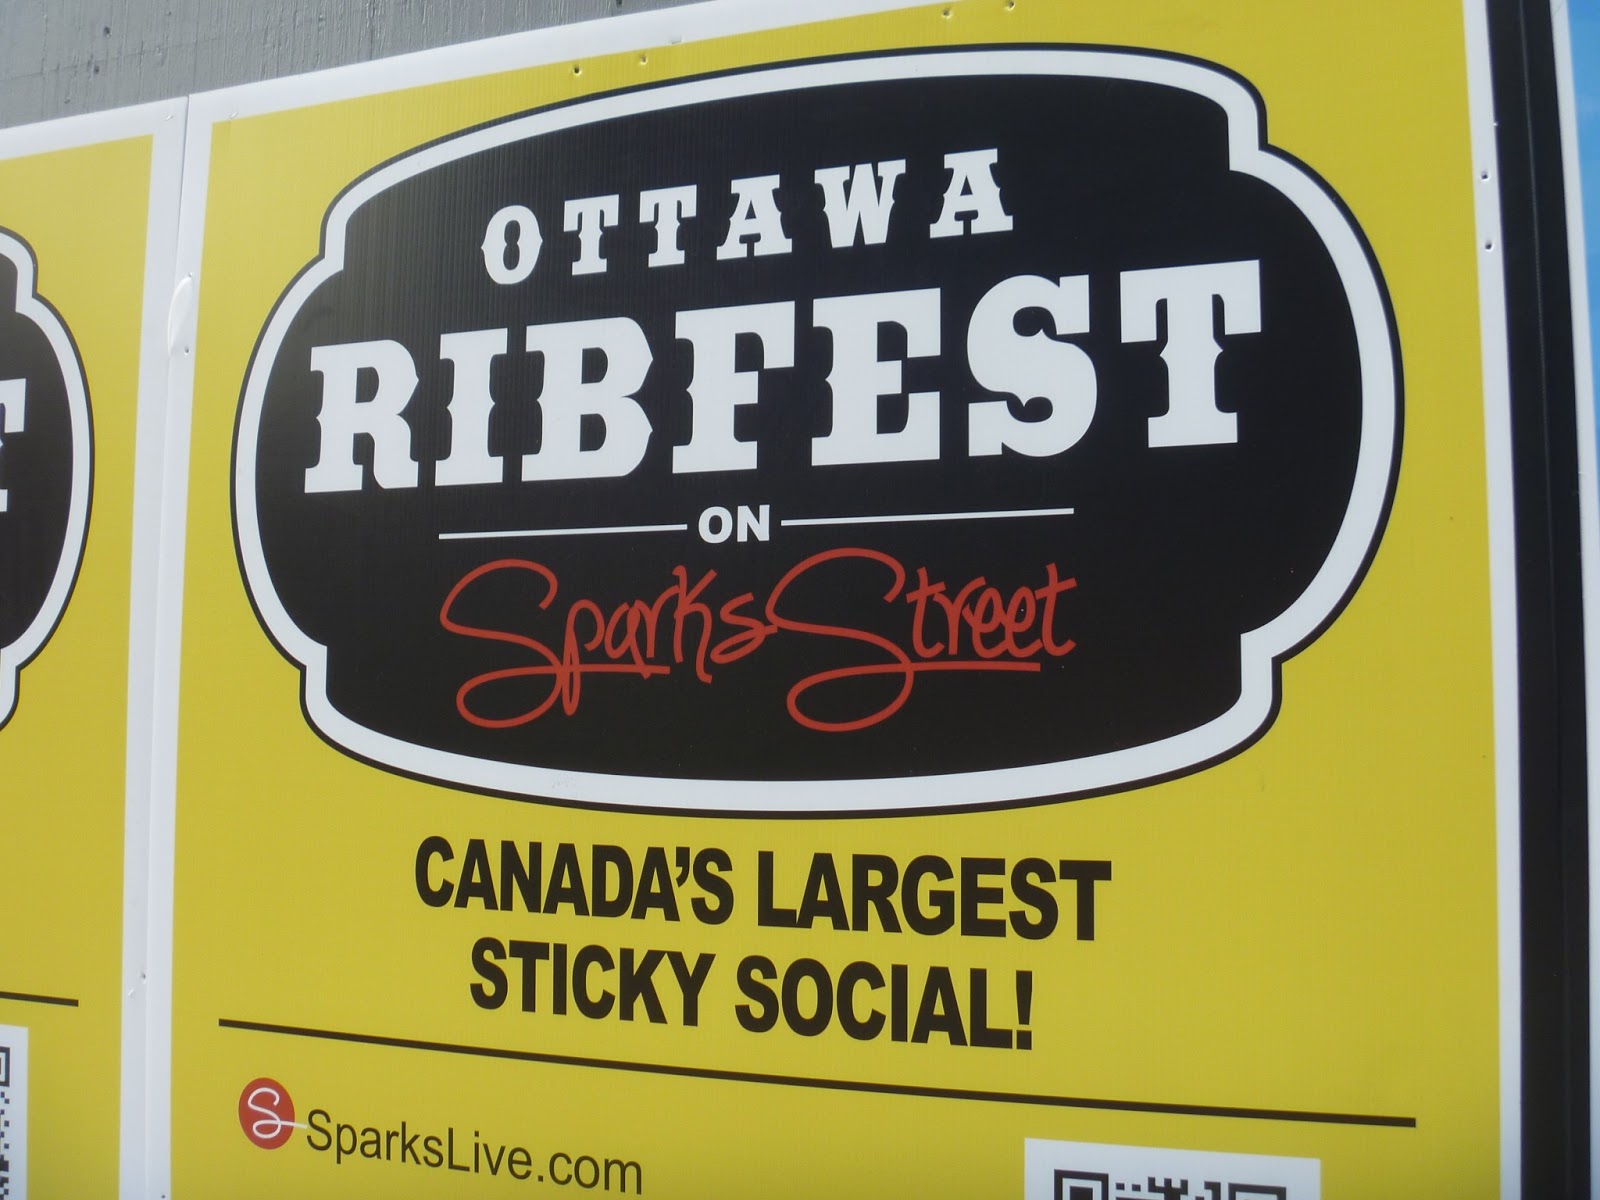
Living in downtown Ottawa can lead to a pretty awesome series of annual festival and event traditions. There's Jazzfest, Fringe, Canada Day, Bluesfest, and so on. But in the the past decade or so, one event has become a pretty integral part of creating a Summer worthy of remembrance in Ottawa. That event is the Ottawa Ribfest on Sparks Street. Basically, about a dozen competitive "ribbers" from Canada and the US line up the pedestrian-only street and fill Downtown with smoky meat awesome. 

In this post, I'll be giving you my account of the various porcine treats this year's event had to offer. I went a little more often than I usually do, like every day, but my girl was nearly 9 months pregnant! What was I supposed to do? So, let's go day by day.

Wednesday

The first night of the Ribfest was probably the least involved one for me. I had to work the night shift and had less than an hour to eat.

The first sampling came from the rib stand closest to home (go figure), the Blazin' Big Rig out of Chatham, Ontario. Kari got the standard "Vegetarian's Nightmare" plate of ribs, pulled pork and chicken with sides of beans and slaw. Me, I was intrigued by the Jumbo Turkey Drumstick. Luckily, the boys working the grill had an extra one that'd been left on the heat too long so I got two for the price of one! I also got the sides of beans and slaw.

Blazin' Big Rig

So, I thought it was a really tasty little bit of fowl and something unusual to kick off the Ribsfest. As I mentioned, I had two legs, one cooked "normally" and the other kind of "overcooked", but when you leave a sauce-slathered piece of meat on the heat, it creates a kind of crunchy coating of caramelized sauce that can't be beat. So, I ate the overcooked one and kept the other for later use. Verdict? Well, it was dry from being on the heat so long, but still really flavourful. The sauce was good, but not great. The beans were really tasty as well, but I would have better later on. The slaw, on the other hand, was exactly how I want slaw to be: creamy, tangy and crunchy; best of the festival by far.

Turkey Leg and sides from Blazin' Big Rig - also serves to club seals in a pinch

Thursday

If Wednesday was the tentative first step, Thursday was a full-on jump into the pool. Kari and I wandered around, unsure where to engage in our porcine goodness, but she managed to grab a twisty fried potato treat. We ran into to many of our friends, including my good friend Siobhan who, as a born-again carnivore, was enjoying her first foray into Ribfest and brought her three kids along to enjoy the ride. It was a lot of fun watching the kids' faces light up over ribs and corn on the cob and the frantic crowds. All in all, a good time was had all around.

Sticky Fingers

As for the ribs, we stopped at one of the less busy stands, Sticky Fingers. I only got a half rack, I wasn't in the mood for beans and slaw. The ribs were really well done, exactly the right texture between solid (which can sometimes mean 'tough') and fall of the bone (which too often means 'mush'). Unfortunately, there wasn't enough sauce on the ribs to get a really good idea of its flavour. I've noticed that some of the ribbers would have big bottles of sauce with a squeeze pump so you can load up your pork with as much sauce as you want. Unfortunately Sticky Fingers weren't one of them. Which is too bad, because from the little I could taste, it was a pretty decent, tomato-ey sauce. Oh well...


Half rack from Sticky Fingers

Friday

Friday was a quick trip through the festival for pulled pork as we were trying to get to Confederation Park in time to get a good spot to see Willie Nelson. Once again, we were looking for the shortest line, which we didn't really find, so we settled on Bone Daddy's for pulled pork sammiches.


Bone Daddy's


This is pulled pork the way it was meant to be: moist, greasy, smoky and loaded with sauce. It's hard to review food when it's nearly perfect since there's not much to say! I will give extra kudos on the sauce though, because all too often, the sauce used on pulled pork is "dumbed down" for public consumption and made less spicy and overly sweet. Luckily in this case, the sauce was the right mix of both. I was highly satisfied with this choice! And really, what says Summer more than an outdoor country show with BBQ on your face?


Mmmmmm, grease puddle...


Saturday

Sometimes, a weird serendipity comes along to make your whole Ribfest experience sing. In this case, the decision to meet friends at noon while it was pissing rain led to being able to access one of the rib stands that usually is impossible to get to without waiting for 2 hours in line. There are two stands that always seem to be in the most high traffic area of Ribfest between Bank and O'Connor Streets and are always packed with people: Camp 31 and Silver Bullet. I'd tried Camp 31 in the past (and it wasn't as revelatory as I'd been expecting, but that was mainly due a lack of sauce) and really wanted to give Silver Bullet a go.


Sparks St. in full porcine swing

It was the noon hour and I decided to basically skip breakfast so I could have lots of room to pig out. With that in mind, I got the ribs and pulled pork combo with sides from Silver Bullet. First, the bad news: the coleslaw was, unfortunately, prepared in the same style as that pale green slaw from KFC that I dreaded eating as a kid. Needless to say, I didn't eat all of it. Another downside was that the ribs were served with membrane still attached, a BBQ no-no if there ever was one. It's basically like eating paper.

Now the good news: The ribs, other than the annoyance of the membrane, were PERFECT! They were cooked exactly right and the sauce was one of the best I've had: sweet, peppery, smoky and rich. The pulled pork was also really tasty, but it was overcooked and stringy in parts. The beans were really good as well, nice and rich but not chalky the way beans can sometimes be. They also were chock-full of BBQ sauce flavour, which isn't always the way. Not sure why...


A Porkpocalypse from Silver Bullet

Sunday

By now, I have to admit that my arteries, and even my taste buds, were getting a bit overpowered by smoke and meat, so my review of the next feast might be a bit skewed. It was the last day and sweltering hot and we needed food for our D&D game, so I went out looking to get my pork fix fast. The only place that I hadn't tried that didn't have a ridiculous line-up was Texas Outlaws. I was impressed to see such a wide variety of foodstuffs being offered: pulled chicken, wings, brisket and many more. I decided on ribs and brisket since I have a soft spot for brisket. I wish the girl at the cash had been a bit less of a grumpy jerk, but I guess by Sunday, most of the ribbing staff must have been fed up with the masses of gluttony.


Texas Outlaws - definitely the most variety offered at one stand during Ribfest

So I got my mess of ribs, brisket, beans and slaw home and proceeded to mow down. My impressions were pretty straight forward: the ribs were good, but not great (the sauce had some mustard elements that I wasn't completely sold on), the sides were decent (slaw was kind of ho-hum, but in the way I wanted) and the beans were just a bit too ordinary (and I generally don't like beans most of the time). The brisket was really the saving grace, it was absolutely perfect; not too fatty, well smoked and very flavourful. But, because of the heat, I wasn't able to eat very much. Kind of an anti-climactic end to 5 days of pigging out on pig.

Brisket and Ribs from Texas Outlaws


And there you go; just one glutton's tales of a festival of gastronomic excess.

Enjoy!

Saturday, May 5, 2012

A Toast To My Hometown's Better Eateries - Mill Street Brew Pub

Oh Mill Street Brewery, how you've moderately screwed up my life and waistline...

To begin with, Mill Street (originally out of Toronto) makes what is currently my favourite Canadian beer: Tankhouse Ale. It's a punch-in-the-mouth of flavour and hops that finishes remarkably smoothly. It's by no means a cheap beer, going at about 13 bucks for a six-pack, but life's too short for crappy beer. As the months and years have gone by, Mill Street beers have been appearing more and more frequently at some of my favourite establishments, including Smoque Shack, and festivals, with Mill Street supplying all the beer for Ottawa Bluesfest.

It was at Bluesfest that the signs began to appear: "Mill Street Brewpub - Coming Fall 2011". The excitement started to grow and grow as we found out that the location was to be the former Old Mill, a fairly high end steakhouse in the 80s that had let itself slip over the years and had been closed for a while. The Old Mill building is exactly that: an old grist mill from the 19th century overlooking the Ottawa River, allowing for a beautiful location for a restaurant, if a bit isolated from the main drag of the Byward Market and Elgin Street.

Fall came and went and the anticipation grew. Unfortunately the opening had to wait until January 24th, which is understandable considering the sheer size of the building and the logistics of opening such a large establishment. But the magical day finally came on the 24th and, while we didn't get to show up for opening night, we managed to be there on their second night.

It was absolute bedlam: We arrived at around 5 o'clock and it was already a 30-minute wait for a table for 4. I wasn't really surprised or bothered though. We sidled up to the bar and had some beers to keep us occupied while waiting for our table. In good time, we were brought upstairs to one of the four dining areas.

Now, here are some of the non-food/drink details about the place. First off was the decor. Well, it was a lot flashier than I expected; a weird mix of comforting wood and decoration with a lot of stainless steel as trim. To this day, after about a dozen visits to the place, I still feel like it's a bit to 'classy' looking for a brew pub. Oh well, that's something I have no problem getting over, especially because the views and the building itself are spectacular.

Next up is the service. Well, like most new restaurants, the service had some ups and downs. The front of the house needs work; the hostesses seemed a bit overwhelmed when busy, something that hasn't really changed since it opened. There have been some inconsistencies in the table and bar service, but for the most part it's been pretty good, especially in the case of the waiter we had on our first visit and he's been around a few times since. His name is Dane and I salute him, he was awesome. So, if any of the powers that be from Mill Street read this, treat Dane well! He's a definite asset to your business.

OK, so let's get to the meat of the matter: BEER AND FOOD!!!

Well, one of the things that caught my attention right off the bat was the beer menu. It's freakin' huge! There are something like 20+ beers on tap, including varieties that are exclusive to Ottawa, seasonal beers and the standards (Tankhouse, Organic, Coffee Porter, Belgian Wit and so on). A particularly brilliant offering for those who aren't sure what they want is the Beer Flight, which gives you a choice of 4 small glasses of different beers for $7.50. A VERY good deal!

Now, on to the food. The four of us at the table split a charcuterie plate that had some tremendous elements to it, but unfortunately, what they were exactly was kept a mystery to the wait staff! Whoops... Mind you, because it was only their second day in business, it was common that not all the wait staff had tried everything on the menu. Still it would have been nice to know exactly what we were eating. There was a dry salami that was excellent and ash-rind goat cheese that was the bee's knees.

Next, I had the Brewmaster's Mussels, steamed in Wit beer with smoked pork belly and leeks and all other kinds of goodness. The mussels themselves were pretty normal mussels, but the pork belly made the dish that much better and the bread on the side was baked using a Pilsner beer and was some of the best bread I've had in a long time.


Mussels with Pork Belly?!? OK!!


After the mussels, I got the Caribbean Baby Back Ribs. These were quite tasty and well smoked, albeit not the most tender. The flavour was really good, reminiscent of a milder Jerk sauce, but the portion seemed a bit small for 12 bucks - that's 3 bucks a rib. Still better than Ribfest I guess... The Jicama Slaw on the side was a really nice touch, much earthier than a regular slaw but still tangy.


Ribs!

While I was enjoying my Mussels and Ribs, Kari was partaking of the Stout and Onion Soup (Mill St.'s take on a classic French Onion soup). That one got kudos all around (see look of pure joy captured below). Her next course was the Duck Flatbread, which , while tasty, was a bit stingy on the duck.

What stood out most, other than the great service and surprisingly good food (pub fare is hard to make remarkable), was a seasonal brew called Vanilla Porter. This is like cake in a glass, but not too sweet. It's smooth, creamy, delicious and complex, while still being refreshing and quaffable. It's become Kari's absolute favourite, and one of mine as well. Unfortunately, it's no longer being offered. I guess we'll have to wait till September... le sigh...


So, all in all, Mill Street still has some kinks to iron out and there are hits and misses throughout the menu. I've been back a few times for regular menu fare and brunch fare and some things are better than others. If you are doing brunch and are feeling particularly decadent, get the Chicken and Waffles. Pretty epic...


Happiness = French Onion Soup and 4 glasses of beer

But before I leave you, there are a couple more points in the Mill Street Brewpub's favour that I think are really great touches. First, they have the "Master of Beer Appreciation" card, which is essentially a 'frequent drinker miles' card of sorts. Every time you get on of the multiple kinds of beers on the menu, you get a slot filled on the card. The more slots you fill, the cooler the shwag you can earn, including meals, tours of the brewery, and at the pinnacle, your name engraved on a special keg.

The second (and far more important) thing Mill Street does is a monthly special dinner. The first and second of these were the Brewmaster's Dinner, a five-course meal with special beer and food pairings. The first was held in mid-March and the second in mid-April. We've been to both and I will be blogging about them individually in Part 2&3 of this Toast to Hometown Eateries. Coming up in May is the "Street Fight" involving both wine and beer pairings with special food offerings. I look forward to being at that one too!

So, in the end, I'd say Mill Street Brewpub is the real deal with a lot of care going into both the beer and food menus and lots of space for patrons (although you'll still be waiting 30 minutes + for a table on a Friday night). Now that they've got their patio open, I expect it to get that much crazier. Of course, the fact that it takes 10 minutes from my couch to their front door doesn't hurt either!

Next time, I bring you a recounting of the first Brewmaster's Dinner.

Enjoy!

(Dammit, now I really want a Vanilla Porter...)


Wednesday, April 25, 2012

Travels in Taste - Le Boucan - Montreal


And we're back to our travelling ways...

Once in a while, it helps to have foodie friends in another city. In this case, my friend Regina recommended to me months ago that I forego some of Montreal's more well-known gourmet pig-outs like Au Pied de Cochon and Garde-Manger and try out some old-school BBQ a little off the beaten path (well of my beaten path in Montreal, at least) at a little resto called Le Boucan. Turns out it got a bit of exposure by being one of the restaurants featured on the Food Network program The Opener, but luckily I learned this fact after we got there. I think I might have had some odd bias against the place had I known it was pseudo-famous for being on TV. I know I'm weird, I accept this.

But that doesn't really matter. All I knew was after a slightly disappointing outing at Pied de Cochon back in September, mostly because of the oppressive heat due to sitting at the bar right in front of the open-concept kitchen, I was ready to take an insider's advice rather than general Internet and TV hoopla. Also, RIBS!

So, after our gourmet sojourns in Quebec City, it was back to Montreal for some good old-fashioned meat. Located on Notre-Dame West in Montreal's Saint-Henri neighbourhood, Le Boucan was definitely a step outside where I'd usually hung out in Montreal (Downtown, Old Montreal, The Plateau, etc.). Luckily it was still walking distance from our hotel, but it was a fairly long walk, which served us well because we get there right on time for our reservations. Unfortunately, no one had passed the memo on to the people sitting at the table that was supposed to be ours! So, we had to wait at the bar for a little bit, but that was fine in itself! It gave us a chance to get to know the staff and take in the whole atmosphere of the place. I really liked that it was cozy and dimly lit, it made me think of a get-together at a ski chalet.

As we were waiting, we took in the food and drink menus and I was trepidatious at the lack of microbrews at the bar: on tap was Keith's, Bud and so on. Luckily, there was an item that caught my eye: Bierbrier Premium Ale. I'd never heard of it, so I was intrigued and asked the bartender about it. Turns out the brewery is a few blocks away from the restaurant. So, yeah, that was absolutely going into my gullet. And, much to my delight, it was really freakin' good! Too bad it's only available at restaurants or by going to the brewery itself. Hopefully it'll be available a little more broadly in the future, I'd love to be able to pick up a six-pack sometime soon.

Bierbrier Ale - a local discovery

So, after enjoying a beer and meeting pretty much the whole serving staff and chatting a bit with the cooks, we finally got seated at what might have been the best seat in the house: a snug little two-person table right at the front window. I'll admit, it was chilly (Montreal still being blanketed in early March Winter grossness), but I liked being able to look out onto the street while eating.  

It didn't take much perusing to decide what the starter would be: Smoked Tomato Soup? Damn right! Oh man, it was really tasty. I can't tell whether the tomatoes actually went in the smoker or the smokiness was achieved through the use of liquid smoke, but either way it was a great variation of a classic. The cheese toast on the side didn't hurt either!


Smoked Tomato Soup!
But let's be realistic, I didn't come here for the soup. Next up was the real star of the show: the MEAT! Now, I'm a big fan of all things pork, but I also like a good hunk of BBQ chicken, so I thought it would be a good idea to go for the chicken n' rib combo. As with most BBQ places, you get to pick your own sides. So, naturally I went with cole slaw. But I had to pick another side. Hmmmmmm, what to pick, what to pick... Well, the other choices were fries (yawn), potato salad (in Winter? Naaaaah), green salad (yeah right) and cheesy corn. Wait, what? Cheesy corn!?!?!? YESSSSSSSSS!!! And hey, guess what? Kari picked the exact same sides for her full rack of ribs!


Ribs n' Chicken w. Cheese Corn and Slaw

So, once served (and the service was fantastic - friendly, polite, attentive and fast!), it was time to get down with the meaty good times!

My thoughts? Well, let's start with the sides and work our way in.

The cole slaw was a good, basic slaw. Not really mind-blowing or anything, but it served its purpose to add crunch to the meal and to make the guilt of eating a pound of meat less acute.

As for the cheesy corn, I gotta say that it tasted a bit weird. I figure they used frozen corn, which is fine, but there was a "fake cheese" kind of coating to the tongue reminiscent of Cheeze Whiz. I imagine that was something to do with how it was cooked, because I doubt they'd use that nasty stuff in a resto with a strong reputation for its food, but it is Quebec, and Quebecers like some weird food.

OK, on to the chicken. It was AWESOME! Great sauce and tenderness to the meat, loaded with smoky goodness. I do wish the skin could have been crispier, but that's an eternal lament when dealing with BBQ chicken. If there's some pit master out there who has perfected crispy-skinned BBQ chicken, I will trade favours for your secret. Lots of favours...

Finally, on to the ribs. Oh the ribs. Some of the best I've ever had and I've had a LOT of ribs. They had the perfect texture of 'fall off the bone' but not mushy. They were well smoked but not overdone. The rub was pretty basic, certainly not intended to be the star of the show (unlike when I make ribs and obsess about making the ultimate rub). But what REALLY made the ribs was the sauce. OMG, the sauce... It was delicious and unique, which are the two necessary hallmarks of a great BBQ sauce. It had a low-medium spice level, so very accessible, it had good sweetness without tasting like candy, but what set it apart was that the most forward flavour I could taste was cumin. I know what you might be thinking: "Cumin? Whoop-di-doo, it's just freakin' cumin." But in this sauce, cumin is the spice of the gods.

I was able to finish the chicken, but the ribs did both me and Kari in. We got them to go (they made for a tasty midnight snack and road food on the way home) as well as being gifted a piece of Buttermilk Pie! I can't remember if it was because we had to wait for our table, because I mentioned the blog, or because of the general awesomeness and gratitude Kari and bring to the table when we eat out. It's kinda awesome!

Buttermilk Pie - too much for our full bellies! Will eat later...
How was the Buttermilk Pie? Damn tasty, but I can't say I've become a convert. Give me Bread Pudding any time.

And so, that's it for another fun travel in taste to Montreal. And by no means coincidentally, the next day was lunch at Schwartz's before hopping the train back to Ottawa.

Life (and food) is good on the road!
Cheers!


Thursday, July 14, 2011

Ribs Redux

Hi!

Well I'll be damned! Another smokey discovery recently made!

If you've ever done any research into smoking meat, you may have noticed that there are as many different ways to smoke food as there are kinds of wood. It can get a little frustrating when you're investing a lot of time and money and effort to find out how to do something the best way possible only to discover there are 50 other ways to do it that may or may not be better.

In my original post on smoking ribs, I presented the 3-2-1 method of smoking, which involves rubbing the meat and refrigerating it overnight, smoking them for 2.5 to 3 hours uncovered, wrapping them in foil (aka "tenting") and splashing them with some sort of flavourful liquid (apple juice, cider, etc.), smoking for another 2 hours, unwrapping and finishing for an hour. Now, this always produced super-tasty ribs, but they never were quite the right tenderness for my exacting tastes.

So, with that in mind, I went back into Internet Search mode and found a different technique, one which involves a bit more work and attention, but the results were fantastic. I give credit to The Smoker King for this method, which I didn't follow to the letter, so I'll break it down for you in my own words and personal tweaks.

OK, so first of all, nothing has changed with the basics. We're looking for back ribs, membrane removed, rubbed in whatever goodness you have since invented or found online (or, if you're still using one of the rubs I've posted, awesome! Thanks for the compliment!) and left in the fridge overnight.

It's the next day that things get interesting.

Once your meat has been sitting out for about an hour to get to room temperature and your fire is going, it's time to apply the new secret technique! Oooooo...

What is said technique? A ridiculously simple mop sauce.

Mop Sauce for Ribs

- 1 1/3 cups apple cider vinegar
- 2/3 cup olive oil
- pinch of rib rub (if you don't have any, just a pinch of brown sugar and a tiny pinch of cayenne will suffice) NOTE: This pinch of rub is optional. Sugar burns/caramelizes during the smoking process, and the rub contains sugar. Some of us, like me, like this crispy, burnt-y, bitter flavour. Many do not. If you don't, omit the rub/sugar and just add a pinch of cayenne and some salt.

- Whisk together in a ceramic/glass bowl with a whisk or fork

Apply a generous amount of mob sauce to both sides of the rack(s) of ribs.

Place ribs on the smoker (bone side down) and smoke uncovered for 5 and a half hours. Apply a layer of the mop sauce to the top side of the ribs every 45 minutes, no need to mop the underbelly. Also, if you can find it, try out pecan wood with your ribs, its flavour is just wonderful. If your smoker is like mine, you may need to move the ribs around a bit to ensure even cooking. Don't flip them over though.

At the 4 hour, 30 minute mark, wrap ribs in foil with the rest of the mop sauce. Smoke for another hour.

Remove, unwrap, and let stand about 5 minutes before cutting into sections.

Admittedly, this results with this method aren't as pretty as the mahogany coloured ribs you get from the first method I've used. These ribs are going to be "wetter", even before you add BBQ sauce. But the texture and tenderness is PERFECT. Well, at least the closest I've ever come.


So, the rib experimentation will continue until TRUE pork perfection is achieved!

Till then, may you smell of wood smoke and meat vapour! And may every bite be as tasty as the last!

Cheers!

Monday, January 3, 2011

Smoking - Part 1 - Overview and Ribs

-
Happy New Year, fellow foodophiles!

Here's a tale that has no business being told in the middle of Winter, but I did promise to blog about smoking food a while back and I wouldn't want anyone accusing me of blogular reneging.

Back in Summer of 2007, I moved into a one-bedroom apartment on my own. This was the first time I'd done so since 2003 and I found myself needing a lot of stuff, namely a barbecue to go on my awesome deck, which was the main reason why I took this apartment in the first place! Now, where I'm from, there are laws prohibiting gas barbecues in apartments. The reason for this? There's a safety risk in having a potentially explosive propane tank inside. Now I know that many people flout this law, but it got me thinking that perhaps I should explore the idea of a charcoal barbecue instead, which is completely legal. I know I covered this in my April post about BBQ season, but it's part of the narrative, so stick with me here.

Anyhoo, off I went to Canadian Tire with my girlfriend and picked out a very affordable BBQ with an offset smoker box. I didn't really think I'd use the smoker much, but it was about a 20 dollar difference from the model that didn't have the box, so I figured "you never know" and bought it. Here's a picture of my baby (the smokebox is the smaller compartment on the left)!


I went a couple of years before even trying out the smoker, but finally gave it a go in the Summer of 2009. I figured the first thing to try was ribs. After all, ribs are one of the best "blank canvasses" when it comes to cooking, and it's not difficult to cover up your mistakes with lots of BBQ sauce. But before you can smoke anything, you need fuel!

CHOOSING YOUR WOOD

I prefer using lump charcoal. It provides a more natural flavour and ignites faster. Lump charcoal burns a lot faster than briquettes, but that's OK when smoking, because you usually smoke food at low temperatures and something that burns fast will allow you to regulate your heat better. In addition to charcoal, you'll need some kind of wood to help flavour the smoke. I've acquired lots of different types of wood from Home Hardware and Canadian Tire. I imagine Wal-Mart, Rona, Lowe's and many others also carry wood for BBQ/smoking. Right now, I've gathered a supply including Maple, Cherry, Apple, Alder, Hickory, Mesquite and Cedar. I'd like to get some Pecan and Peach as well, if only to see how different a flavour they impart. I read a story online from an expat in Thailand mentioning how the locals use Mango wood to smoke their food. How awesome would that be!?!?

Now, you may ask yourself, which wood should I be using? Well, that all depends on what you're smoking. I've only done pork, fish and shrimp so far, so I haven't used all the types available. But here's a basic guide to what woods match well to what foods:

- Alder: mild and slightly sweet. Best with fish, pork and poultry

- Apple: fruity and sweet, especially good with pork. I like to use it with fish as well, but that might not be considered "normal"

- Cherry: rich, fruity, slightly sweet. Goes well with any meat. I like to smoke pork tenderloin with a mix of cherry and hickory.

- Hickory: rich, strong smoky flavour. Probably the most common wood used in smoking and good for anything except possibly fish (Hickory would overpower the natural flavour of any white fish and maybe even salmon). A mix of Hickory and Mesquite is good for spicy or peppery meats like ribs and beef brisket.

- Mesquite: strong but slightly sweet. Good for poultry, beef and pork. As with hickory, too strong for fish.

- Cedar: VERY strong flavour, probably too strong for most meats. Since cedar has a very distinctive pine taste, it would overpower just about everything if used in more than the tiniest amounts. And apparently it might be toxic. Makes we wonder why the heck Home Hardware sells it! grumblegrumblegrumble...

- Maple: strong and sweet. Maple could realistically be used with any meat, but the amounts have to be regulated. Also, since most lump charcoal you get in this part of the wood is made of maple, you'll get a maple smoke flavour from that.

Of course, most of this was figured out through a combination of trial and error and Internet research. But, to sum up what I've done and used so far:

- Ribs (made three times): Hickory and Mesquite (and a handful or two of Cherry and/or Apple)
- Pork Tenderloin (made twice): Cherry and/or Hickory
- Tilapia (made twice): Apple and/or Alder
- Arctic Char (made once): Apple and Alder
- Shrimp (made once): Apple and Alder

Alright, let's go on to the first thing I ever smoked: RIBS!

SMOKING RIBS

During a slow day at the office, I took to the Internet for advice on how to pull off smoked ribs. I'd previously done slow cooker ribs and baked/grilled ribs with varying results, but all being tasty (more on that process in this post). One piece of advice though, if you're going to slow cook ribs, remember to skim the fat off the top! I forgot to do so and my ribs were pretty much too fatty to be edible.

Anyhoo, as with just about everything else, the 'Net was chock full of helpful advice. I compiled a bunch of info from a variety of sites, and I've tried a few different ideas. Now, the whole "fall off the bone" concept is one I haven't quite mastered yet, but I've gotten pretty good at the "damn that's tasty" side of it. So, let's get into the "how-to" of smoking ribs. I'm assuming you rushed out and bought an offset smoker or Big Green Egg or something like it and are ready to get on with it!

Right, first things first. What kind of ribs are you going to use? Well, smoking involves a certain amount of drying out of the meat, so I'd go for the more tender cut: back ribs. Side ribs are better for the oven or slow cooker. I've also heard that short ribs work well for smoking, but I haven't given it a try.

For now, let's stick to back ribs. So, how do you smoke a tasty rack of ribs? Well, I'll be the first to admit that I haven't quite gotten the whole 'tenderness' aspect of it figured out, but I'm getting close. So, don't get frustrated, all cooking is a journey towards perfection, but rarely does one arrive.

So, you'll need to prep your rack(s) of ribs before they can be smoked. You'll want to give yourself a day to either brine, marinate or rub your ribs. I've only used the rubbed method, but I'm quite curious to try brining ribs. It's done wonders for my smoked fish recipes (more on those in a bit).

Before you can rub/brine/marinate your ribs, you'll need to remove the membrane, found on the underside of the rack (concave rather than convex); otherwise your ribs will be rather tough. Now removing this thing is somewhat difficult, and is best done with a sharp knife, pliers, possibly even gloves, and great care and patience. I tell you what, let's let the Internet take care of this lesson:

http://www.ehow.com/video_2339996_pork-rib-membrane-removal-tips.html

Alright, now that your membrane is removed, it's time to have some fun! It's rub time! Now, there are rib rubs all over the place. Just pop into any store that sells BBQ equipment and you'll see many brands of rub for sale. Same applies to the supermarket.

Now, being the self-reliant fella that I am, I make my own rub very simply out of a mix of brown sugar and berbere spice, with about a 2-to-1 ratio of sugar to spice.

Here's the berbere spice recipe from the May 27th post:

Berbere spice

1 teaspoon fenugreek seeds
1/2 cup ground dried serrano chili peppers or other ground dried chili peppers
1/2 cup sweet paprika
2 tablespoons salt
2 teaspoons ground ginger
2 teaspoons onion powder
1 teaspoon ground cardamom (preferably freshly ground)
1 teaspoon freshly grated nutmeg
1/2 teaspoon garlic powder
1/4 teaspoon ground cloves
1/4 teaspoon ground cinnamon
1/4 teaspoon ground allspice

Finely grind the fenugreek seeds with a mortar and pestle or in an electric spice or coffee grinder. Combine the remaining ingredients and add the ground fenugreek seeds, mixing well. Refrigerate in an airtight container for up to 3 months (although I've had batches last 6 to 9 months in the fridge and be fine).

Now, the berbere spice is pretty fiery and makes for a rather spicy rib. If you prefer things a bit more tame, there are numerous recipes on the 'Net. For example, here's one from About.com:

Kansas City Rib Rub

Ingredients:

1/2 cup brown sugar
1/4 cup paprika
1 tablespoon black pepper
1 tablespoon salt
1 tablespoon chili powder
1 tablespoon garlic powder
1 tablespoon onion powder
1 teaspoon cayenne

Preparation:

Combine all ingredients together and transfer to an air tight container. Maybe stored up to six months.

Nick's note: You could omit the cayenne if you want barely any heat at all.

Now, once you have your rub all mixed together, I suggest getting a glass/pyrex lasagna pan, place a rack at a time in the pan and generously apply the rub all over, pressing it firmly into the meat to ensure it is absorbed. You might even want to score (slice small cuts on the surface) the meat a bit for maximum absorption.

Once the meat has been coated with the rub, wrap it in plastic wrap, pressing all air out, and store in the fridge for 12-24 hours and dream of smoke and pork and joy.

Next day...

Let's hope you picked a nice sunny day and have an empty calendar for the day, because you're about to embark in a 6-7 hour smoking bonanza. It might be time-consuming, but MAN is it therapeutic! Having a case of cold beer around doesn't hurt either...

So, take your ribs out of the fridge and unwrap them. Let them warm up a little bit, for say 30 minutes. Here's what they look like out of the fridge:

While the ribs are getting closer to room temperature, you're going to want to get a large container of some sort and fill it halfway full with water. Take handfuls of whatever wood chips you would like to use and soak them in water for at least 30 minutes. That allows the wood chips to burn slowly in the smoker and produce lots of delicious smoke.

Next we start the fire. Let's be clear off the bat: AVOID any kind of chemical fire starter, especially when smoking. It ruins the flavour and is probably not too healthy. So how do you start a fire without lighter fluid? Well, a lot of people swear by the chimney starter, but I have my own method of starting a fire that works pretty well. I use an electric starter like this one:


You can find it at the same stores you find all your other BBQ supplies. Just plug it into an extension cord or outdoor outlet. The element heats up quickly and becomes red-hot. Find a way to keep the starter fixed in a position that allows you to pile charcoal on top in a pyramid-type formation as best as possible. Once this is done, leave it for about 10-15 minutes and let the element do its job. You'll hear the fire starting as the charcoal begins to crackle. At this point, unplug the starter and gently remove it from the pile of now-smoldering coals, trying your best not to disturb the coal bed, and put it aside somewhere fireproof as it cools down.

You're not looking for a huge fire here, because we don't want the temperature going over 225-250 degrees Fahrenheit. Keep the pile under about half a foot in diameter and no more than 3-4 inches high. If it isn't hot enough, you can always add more charcoal. If it's too hot, it's a lot harder to remove lit coals! If the fire needs a bit of a boost to get it going, there's always blowing on it, but I find fanning it with a fairly large piece of box board works perfectly.

So now our fire's going and the wood chips are soaking, so it's time to get the meat on the smoker! Place the meat directly on the racks of your main grill area if you're using an offset barrel smoker like mine. Otherwise, follow the instructions on the box!


Don't worry about the bright patch on the front rack, that's sunlight!

So, now all you have to do is shut the lid and let the smoke do the work! We'll call this Step 1 of what some nice person on the Internet called the "3-2-1 method" of smoking, which consists of 2.5 to 3 hours of smoking the meat as is, followed by 2 hours of smoking the ribs "tented" (wrapped in foil and moistened with some sort of liquid, I use apple juice), and finally 1 hour smoking unwrapped to finish.

Now, I have a little confession to make: I usually cheat and put anything I've smoked in the oven at 350 degrees for 10-15 minutes. It just seems to make everything right in the end. Not entirely sure why...

So, as you're going through Step 1, ensure you have a steady stream of smoke flowing through the smoker to the meat, add handfuls of wood chips to the fire as you go to keep the smoke going. Also, try to keep the temperature between 225 and 250 degrees. Any smoker should come with a thermometer built in. As for the meat, you don't need to do a thing to it during Step 1.

Now, it's best not to open the lid to the BBQ too much because the smoke can escape, but if you're like me, you occasionally want to look in, just to see how it's coming along.

And because you like to take pictures:


As you can see below, the meat is definitely cooking.


This is about what the ribs are going to look like at the end of Step 1. After 2.5 to 3 hours have passed, it;'s time for Step 2. Remove the ribs from the grill using tongs and place each rack on a piece of heavy-duty aluminium foil large enough to completely wrap up the ribs. Spray a good amount of apple juice or other liquid (but not alcohol or vinegar, as these may dry out the meat) on each rack of ribs, on both the top and bottom. This is going to help steam the ribs and make them more tender. Wrap up the ribs tightly, containing all the juice, and return them to the smoker for another 2-2.5 hours.

At this point, you might want to get started on the finishing sauce, if you're making one. I posted the recipe for my homemade BBQ sauce back in July, but you can make variations if you want or even use a high-quality store-bought sauce. To be honest though, the ribs will be tasty with or without sauce. It's up to you how you want to serve and/or eat them.

So after Step 2 has passed, unwrap the ribs again and place them back on the grill for another hour. Spray them again with apple juice to keep tender. If there any woods you want to experiment with, now's the time. The smoke won't penetrate right into the meat, but it will flavour the surface of it. 

This is what your ribs will look like after being wrapped. GORGEOUS!


Smoke for another hour. Once done, place onto a baking sheet and cook in the oven for another 10-15 minutes. You can choose to cut them into segments before or after baking them. I did cut them up before baking last time and it worked well.

Pull them out of the oven, serve with whatever you're having on the side and chow down!


Is there anything classier than serving a meal on cooler?

Till next time, enjoy!

Sunday, May 16, 2010

RRRRRRRRIIIIIBBBSSSSSSS....

Yeah, we all love 'em, they're delicious messy pig awesome.


Now, making ribs the 'pure' way is about as far from 'easy bachelor cooking' as it gets, but there are ways to cheat. I like to smoke my ribs, but it involves having a smoker or making a smoke packet, all of which are far more complex than necessary to make a whack of "DAMN that's good" ribs. For now. Soon, teach you smoking I will young Padawan, hmmmmm... Yeah, cause I did my first smoke job a few days ago and I all I can say is GODDAMN!

But, for now, let's make those suckers easy. Basically there are as many variations on a good rib rub/marinade as there are bad AC/DC cover bands... So, I'm going to crib from my buddy Paul and adapt his easy rib recipe for today's post:

Step 1 - Get some ribs. Side ribs are cheaper, and you don't have to remove the membrane that you do for back ribs. Granted they aren't as tender, but for this trial, let's stick with side ribs.

Step 2 - Get some cheap BBQ sauce for the marinade/pre-cook. Kraft Garlic works just fine.

Step 3 - Using a food processor (hopefully you've picked one up by now, if not, chop the bejeezus out of everything!), purée an onion and as many gloves of garlic as you think you can handle. Add a few drops of liquid smoke (and only a few drops, it's mighty powerful stuff!) and as much hot sauce as you like. Mix it all together with the BBQ

Step 4 - Here's where you get creative. Use any of the following ingredients in reasonable quantities (and when I say 'any', I don't mean all! It's an exercise in 'mix and match to your taste'):

- bay leaf
- parsley
- oregano
- basil
- dry mustard powder
- cayenne pepper
- paprika
- cumin
- coriander
- dry cocoa powder
- brewed coffee
- rice wine vinegar
- beer (my fave!)
- whiskey
- red wine (for a richer sauce)
- tomato juice/veggie cocktail (if you like a richer tomato flavour)
- pineapple (gives a nice tang, I like it!)

Mix this all together in the food processor or whisk together with the BBQ sauce & onion/garlic puree.

Step 5 - Using a roasting or lasagna pan, lay out the ribs and pour sauce over them, rub the sauce into the meat. Make sure the meat is all well covered.

Step 6 - Cook ribs in oven for 4 hours at 200 degrees Farenheit.

Step 7 - Increase heat to 240 and cook for another hour. Remove from marinade. Ribs should be close to falling off the bone, but that isn't guaranteed. And really, they're still DAMN tasty.

Step 8 - Preheat grill or broiler (the broiler works just fine, but using the grill will give your ribs that smoky BBQ flavour)

Step 9 - Brush ribs with higher quality BBQ sauce. Remember the PC Smokin' Habanero Barbcue Sauce from last time? Yeah, that stuff works nicely if you like the spicy. If not, I suggest Diana sauce of whichever variety.

Step 10 - Cook ribs until sauce glazes and forms a crust of sorts. Do this on both sides. You can do this as much as you want. Usually 3 'coats' of sauce is good, but it's a question of taste.

Step 11 - Cut ribs into portions of single ribs or sets of three. Up to you really...

Step 12 - Keep lots of napkins handy and EAT!


ENJOY!!!!